

DayForce ATS
Dayforce Configuration Details
1. Company ID
You can find the Company ID in your Dayforce profile or in the URL after logging in. For example, https://test.dayforcehcm.com/acme → Company ID is acme.
2. Username
The username used by the web-service user during account creation. You can find it in your Dayforce profile.
3. Password
The password used by the web-service user during account creation.
4. Environment
Select Production or Test based on the Dayforce environment you are connecting to.
5. Identity Host — Optional
The Identity Host is used to generate the token URL. These details are typically provided in your Dayforce welcome email or by your HR/IT administrator.
- Production: Leave empty. We use
dfid.dayforcehcm.com - Test: Enter the Identity Host provided for your test environment, e.g.
dfidtst.np.dayforcehcm.com
Token URL: https://{identity_host}/connect/token
6. Client Host — Optional
The Client Host is the Dayforce instance used for API requests. These details are typically provided in your Dayforce welcome email or by your HR/IT administrator.
- Production: Leave empty. We use
www.dayforcehcm.com - Test: We use
test.dayforcehcm.com
API URL: https://{client_host}/api
Note: Use the above hosts for Production and Test. If you have a different Identity Host or Client Host, use the values provided in your Dayforce welcome email or by your HR/IT administrator.
Configure Feature Access
-
Click on the hamburger button ( ☰) in the top left of your screen, and then click on System Admin > Roles
-
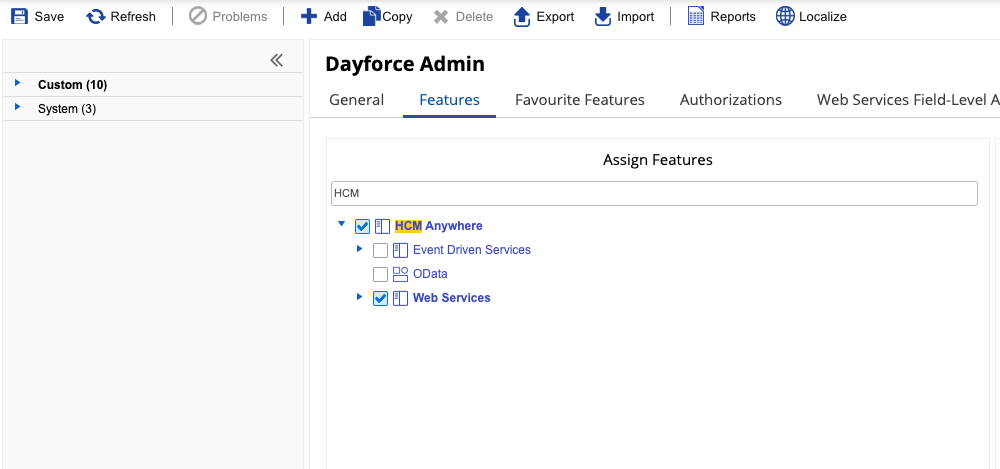
Navigate to Features. Ensure HCM Anywhere and Web Services are checked
-
In Web Services, expand the section and turn on POST/PATCH Candidate and Job Application Sourcing (this is mandatory for Dayforce).
-
Using the top search bar, go to Recruiting Setup > Client Properties and enable Allow Candidates and Job Application Sourcing from External Job Boards.
-
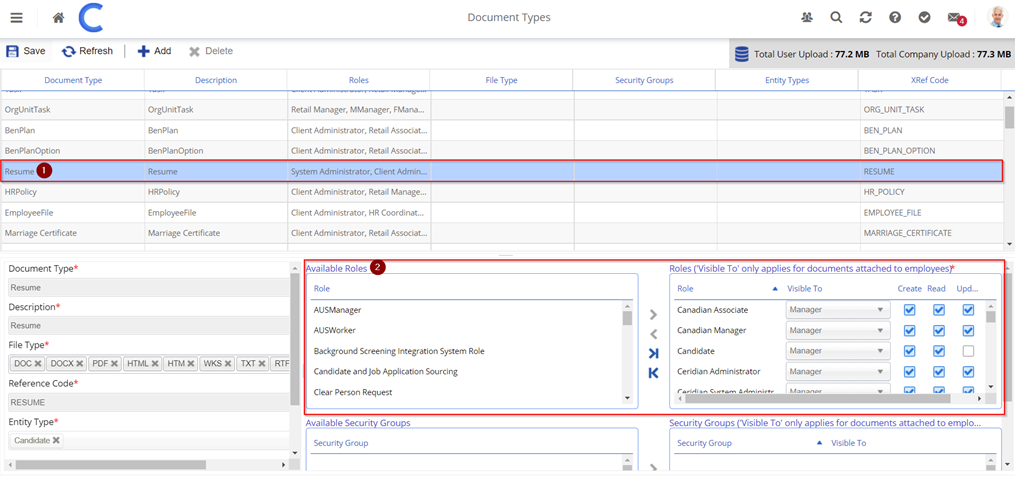
(OPTIONAL) Ensure your user role has permissions for Resume and Supporting Candidate Document under Documents > Admin > Document Types.
- Select each document type and use the right chevron (>) to add your role to the Roles panel on the bottom right.
- Grant your role Create, Read, and Update access.
Updated about 1 month ago