Xero OAuth Guide
This guide will help you to create your own OAuth app in Xero so that your users can see your brand and logo when they integrate with Xero through Knit.
Create your Xero OAuth app
After completing this guide, you'll be able to use the Xero integration to connect up to 25 companies.
To connect more than 25 companies, you must apply to become a Xero App Partner.
Steps to set up Xero OAuth app
1. Create a Xero App
-
Visit the Xero Developer Portal and log in.
-
Go to My Apps and click New App.
-
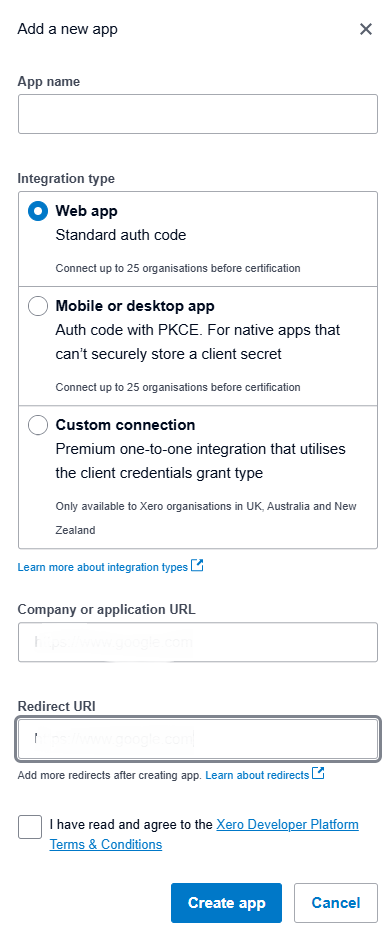
Fill in the following fields in below shared form
- App name: A clear, user-facing name for your app.
- Integration type:
Web app - Company or application URL: e.g.,
https://yourcompany.com - Redirect URI:
https://app.getknit.dev/oauth/authorize - Accept the Terms & Conditions. and Click on Create App
2. (Optional but Recommended) Add Privacy Policy & Terms
- From the My Apps page, select your app.
- On the App details page:
- Enter your Privacy policy URL
- Enter your Terms and conditions URL
(Both must start withhttps://)
- Click Save.
3. Retrieve Client ID and Secret
-
In the Xero Developer Portal:
- Go to My Apps > your app.
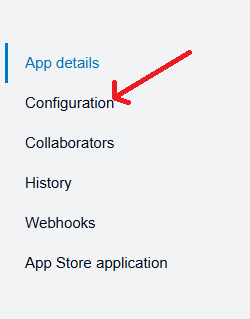
- Open the Configuration section.
- Click the 👁️ icon to reveal your Client ID.
- Click Generate a secret to get your Client Secret.
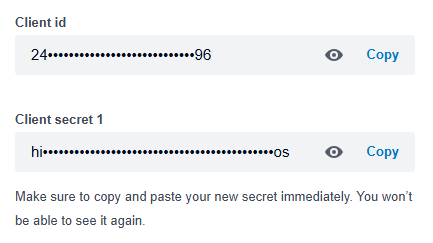
- Copy and store the secret securely. You won’t be able to view it again once you leave the page.
4. Share credentials with Knit
Share the credentials for the newly created Xero OAuth app with your Knit POC.