Okta API
This guide walks you through the process of creating a client in Okta and enabling optional features like managing employee-related APIs with phishing-resistant 2FA.
Steps to Create a Client in Okta
1. Sign In to Okta
- Log in to your Okta instance as an admin.
2. Create an App Integration
- Navigate to Applications.
- Click on Create App Integration.
3. Select App Integration Type
-
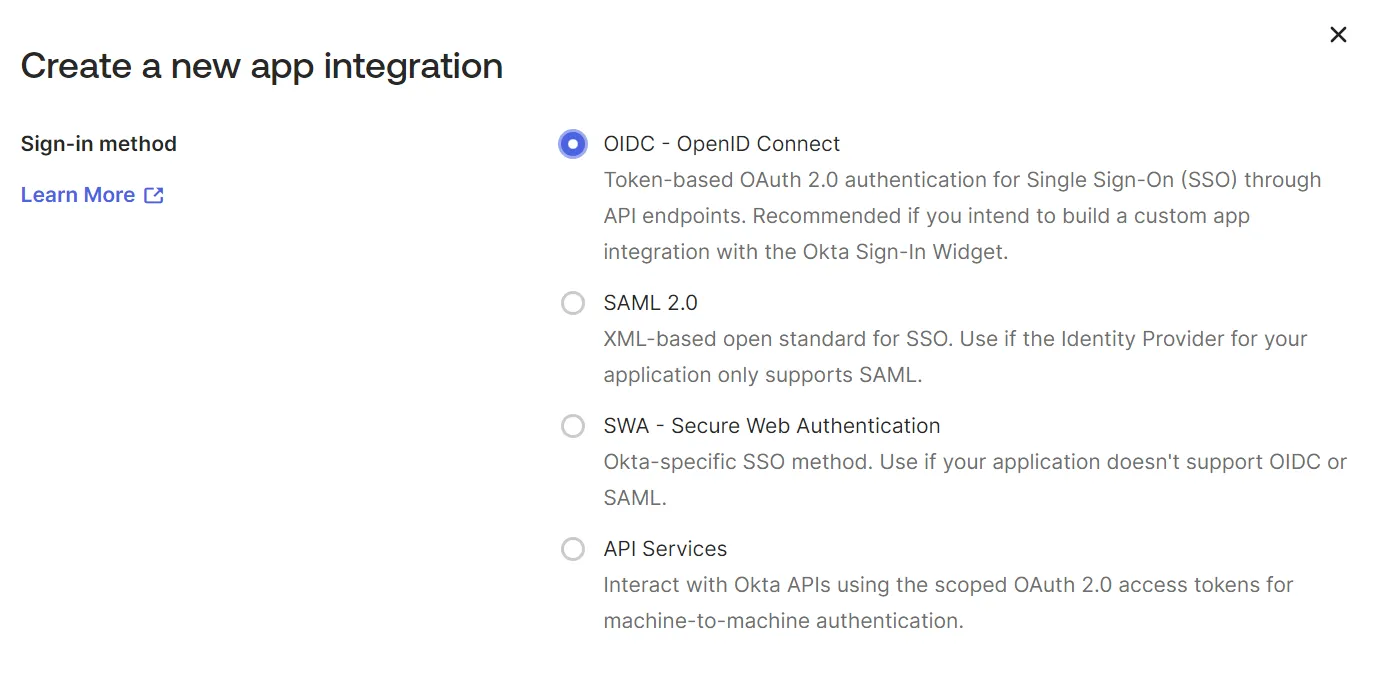
Choose OIDC - OpenID Connect as the Sign-in Method.
-
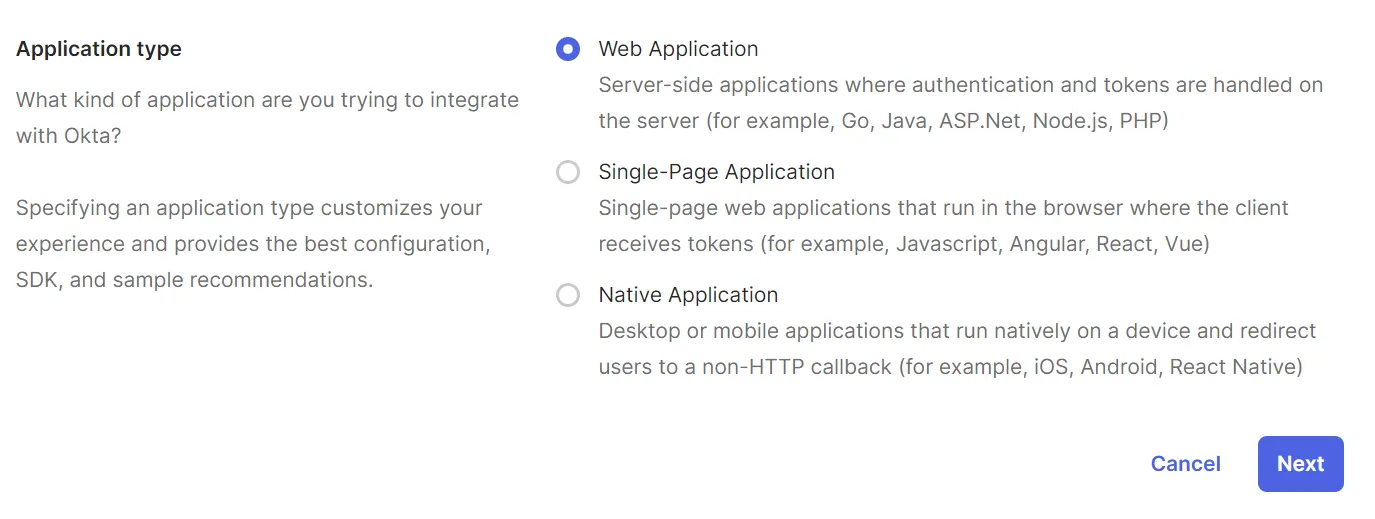
Select Web Application as the Application Type.
-


4. Fill in Integration Details
- Provide an App Integration Name and upload a Logo (optional).
- Under Grant Type, check the following:
- Authorization Code
- Refresh Token
- Set Sign-in Redirect URIs to:
https://app.getknit.dev/oauth/authorize
5. Save the Integration
- Click Save.
6. Configure API Scopes
- Go to the Okta API Scopes tab.
- Add the following scopes:
- okta.users.read
7. Assign Users
- Click the Assignments tab and ensure that the right users are assigned to the app.
8. Save Client Credentials
- Copy the Client ID and Client Secret.
- Store them securely for use during integration.
Reference
- A detailed video demonstrating the above steps is available here: Loom Video.
Optional: Enabling Additional Scopes with Phishing-Resistant 2FA
If you need to use APIs for creating, updating, or terminating employees, enabling the okta.users.manage scope is required. Okta recommends setting up phishing-resistant 2FA for this purpose.
Steps to Enable Phishing-Resistant 2FA
1. Update Authentication Policies
-
Navigate to Security > Authentication Policies.
-
Click on the Any Two Factors policy.
-

-
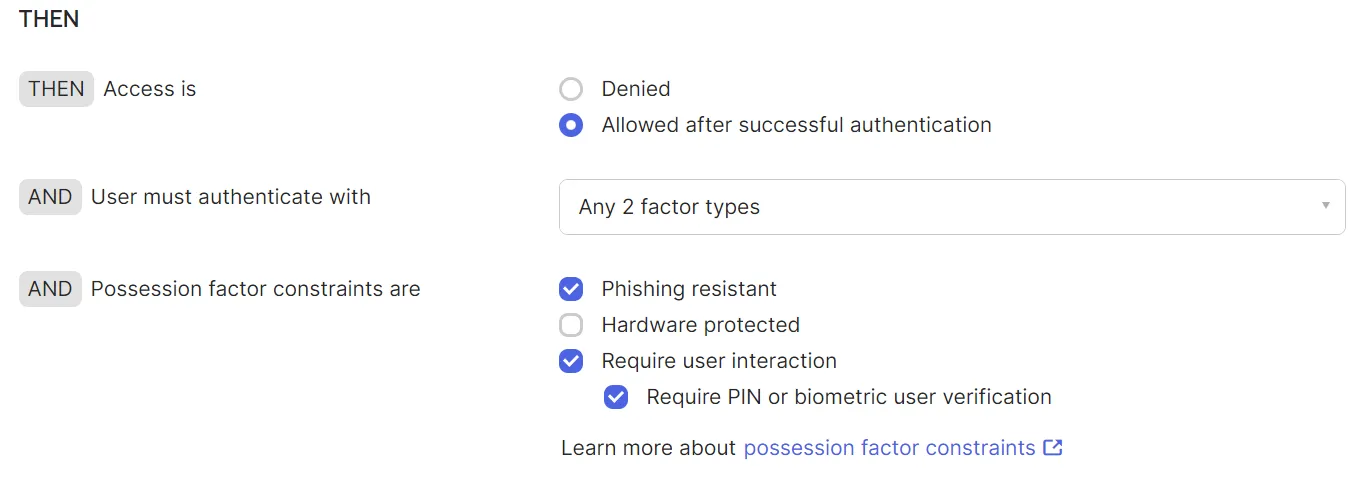
Edit the Catch-all Rule.
-

2. Set Possession Factor Constraints
-
Enable the Phishing Resistant checkbox under Possession Factor Constraints.
-

3. Add Phishing-Resistant Authenticator
- Navigate to Security > Authenticators.
- Add FIDO2 (WebAuthn) as an authenticator.
Final Step
- You are now set up with phishing-resistant 2FA for managing employee-related APIs.
Reference
- Video for creating the integration on Knit using the Okta client: Loom Video.
Updated 8 months ago