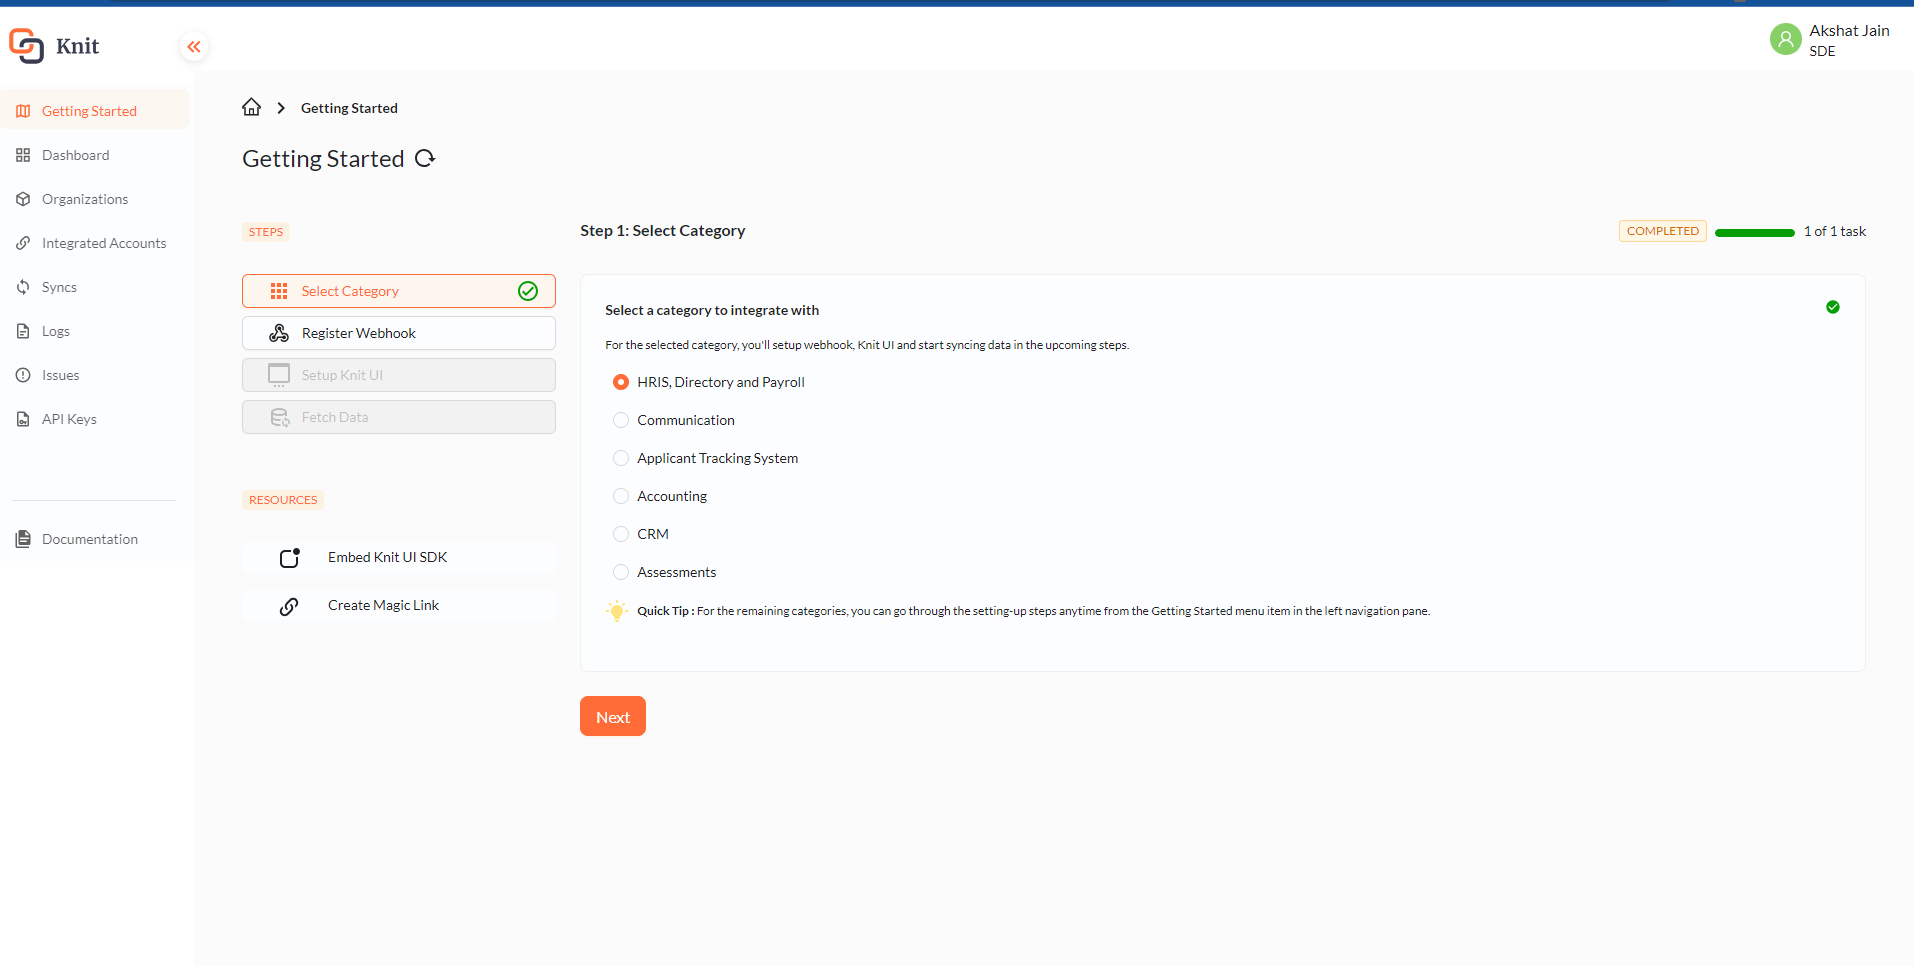
Let's get started!
Follow this checklist along with the getting started journey on the dashboard and get started with Knit in under 30 mins!
Step 1: Select Category
First, you’ll have to select a category that you’re interested in. This would enable you to walk through that category’s events and APIs and get started with it immediately.

Don’t worry, if you’re interested in multiple categories, once you’ve completed all the steps for a category, you can come back and select another one.
Step 2: Register webhook - for categories with syncs
If the category supports data sync, you’ll be prompted to register a webhook for it. If not, then you can skip this step and move directly to the next!
Read about how to register webhooks here: Register webhook URL
Step 3: Setup Knit UI to start integrating with apps
In this step, you should get your API key, and be able to integrate with an app from the frontend using either of the following two methods.
-
By embedding Knit UI
Embedding the Knit UI component lets your users make native integrations from within your app. In this step, we help you get your API Key, set up your backend to make auth sessions, and ultimately embed the Knit UI SDK in your frontend. Read more about it here: Setup Knit UI Component -
Use the Magic Link
If you don’t want to embed the UI component in the frontend, or want your users to get started immediately, you can use the Magic Link feature to integrate with an app in the browser.
Just fill the form with the required information like your user’s organization ID, name, user email address doing the integration, and the category they wish to integrate with and you’ll get a link with which you can get started in your browser immediately.
Don’t worry, if you wish to come back and embed the UI component later on, you can find the documentation in the ‘Resources’ section.
What's an Integration Id?Whenever your user integrates with an app, either through the magic link or the Knit UI component, you'll get an
integration-idfor that integration.This uniquely identifies the user + app combination and is how we can differentiate between integrated accounts. This id would be needed when making API calls, and it would also be present in the webhooks we send to you.
Step 4: Fetch Data and Make API Calls
That’s it! It’s time to start syncing data and making API calls and take advantage of Knit unified APIs and its data models.
If the category you're interested in supports syncs, read about syncs here: Start Sync
You'll also find the documentation references for the APIs supported each the category. For example:
- Payroll API for HRIS
- Create an application in an ATS
- Sending text messages to Slack/Teams
- Creating a Deal in a CRM
- Creating an account in an Accounting software
- Send an Assessment Invite to an applicant
We made it! Now you know everything there is to know about getting started with Knit and how to start integrating applications, syncing data and making API calls.
Be sure to check out the rest of our documentation. You can find all the data models, API reference, and detailed guides about each feature in here!
Please feel free to reach out to us with any questions you may have. We are always here to assist you and ensure your experience with Knit is as seamless as possible!
We’re really excited for you to get started with Knit, and can’t wait to see the amazing things you’ll achieve with it! 🚀
Integrated Accounts are marked as Test by default.You can change a Test Integrated Account to Production or vice versa. See how.
Updated 8 months ago