CyberArk API
Here's everything you need to know about integrating CyberArk with Knit and making API calls
Integrating CyberArk with the Knit UI component
To get started with using CyberArk APIs, first you'll have to create an OAuth application inside CyberArk
How to create OAuth app?
Create OAuth2 Client
-
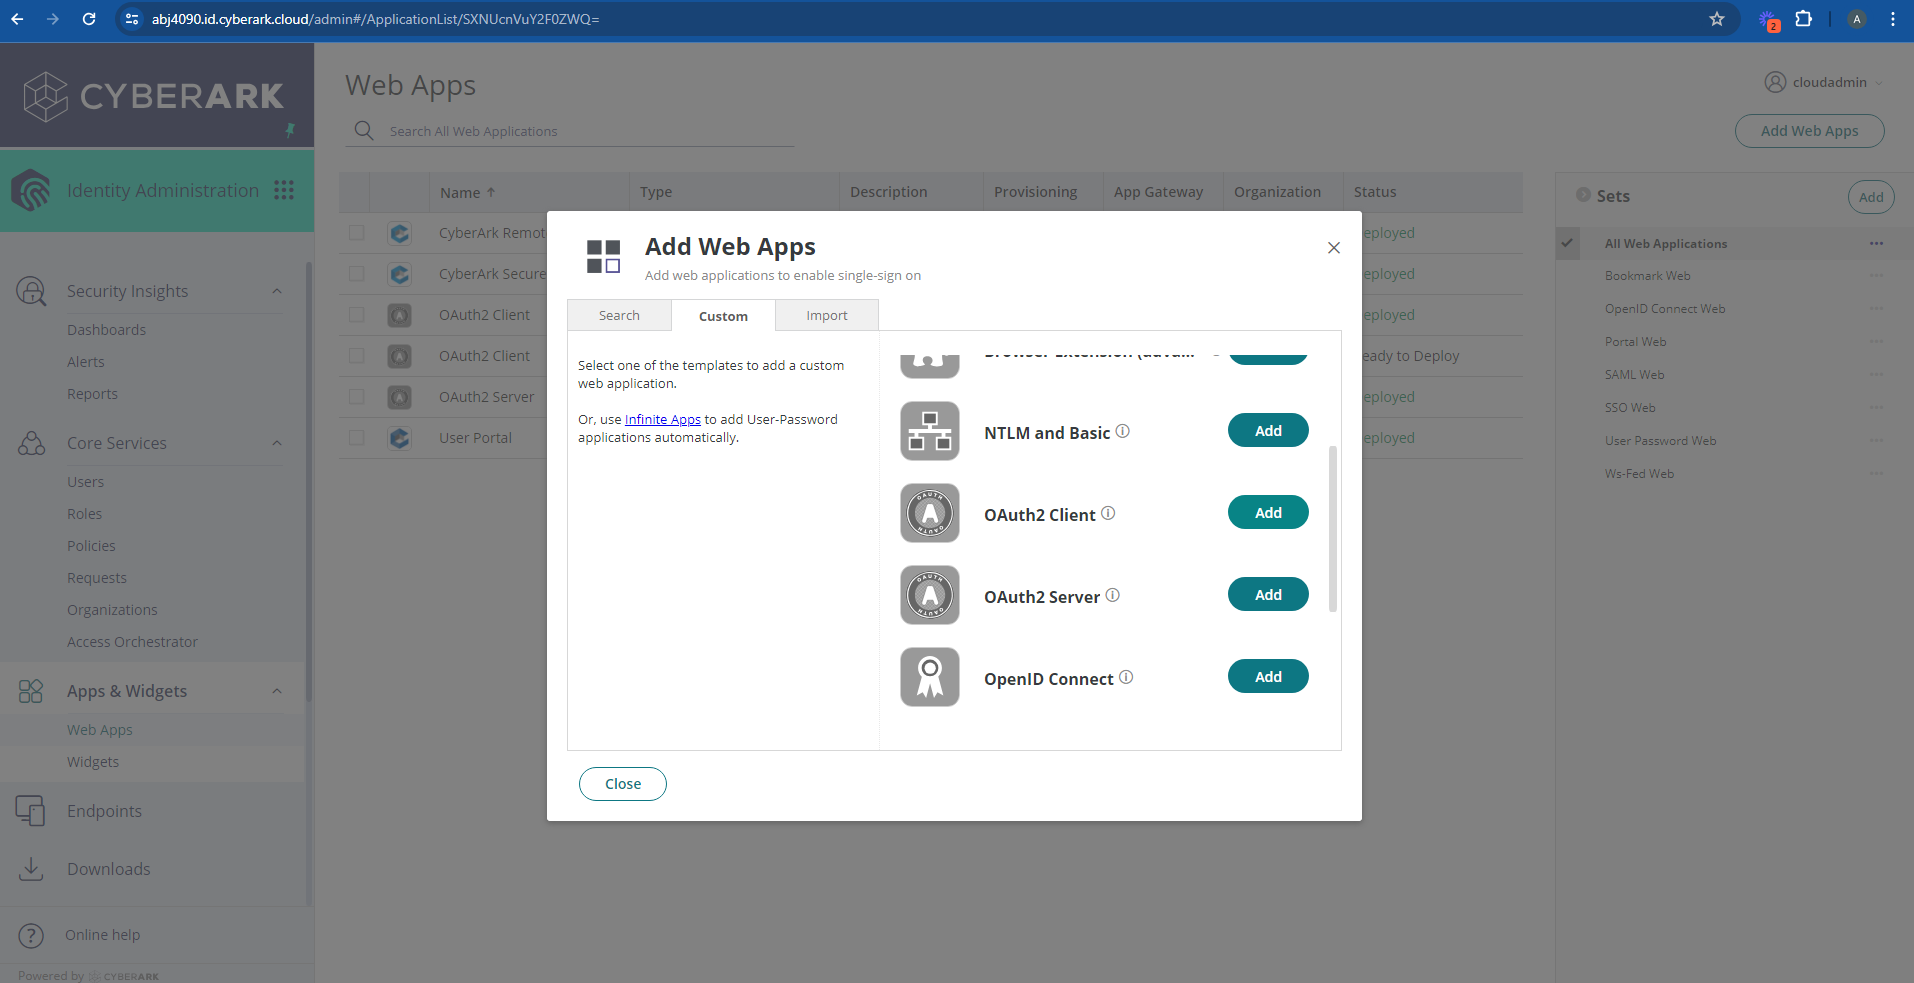
Go to the Web Apps page from the left and click on Add Web AppsFrom the Custom tab, select Oauth2 Client. After adding the OAuth2 client, click on close and you will be redirected to the client settings page
-
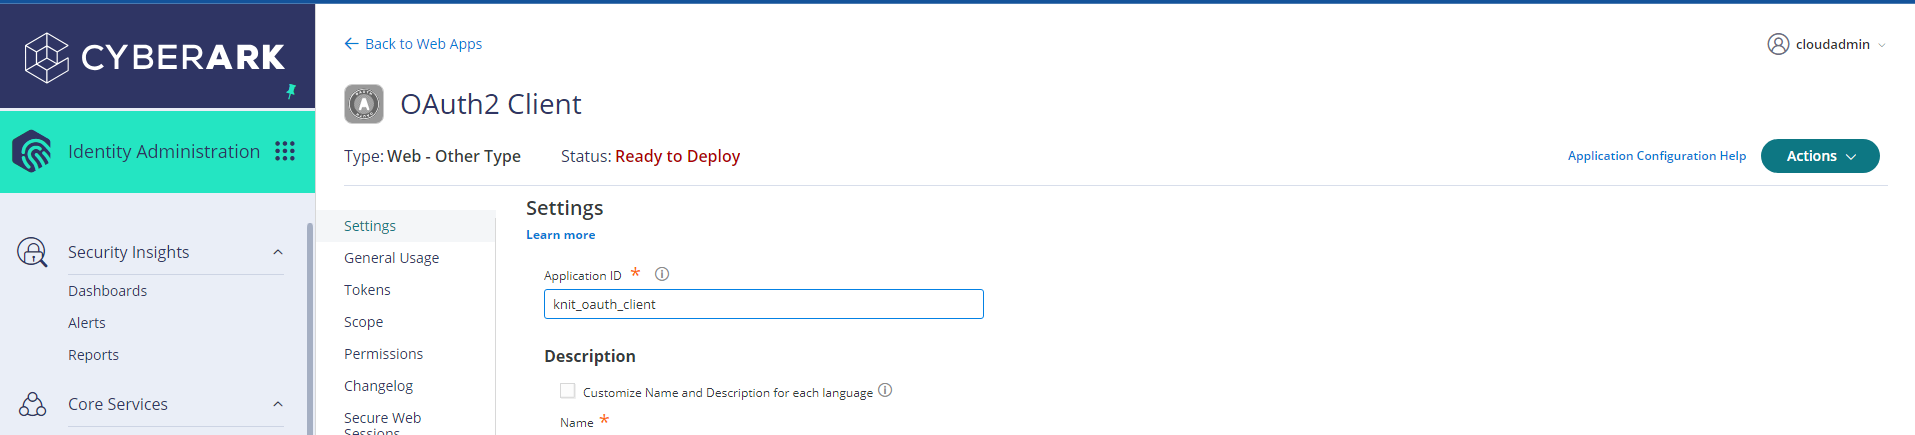
In the settings page, add an Application ID. This will be needed for integration later on
- In the general usage page, make sure that Client ID Type is set to Confidential and Must be OAuth Client is checked

-
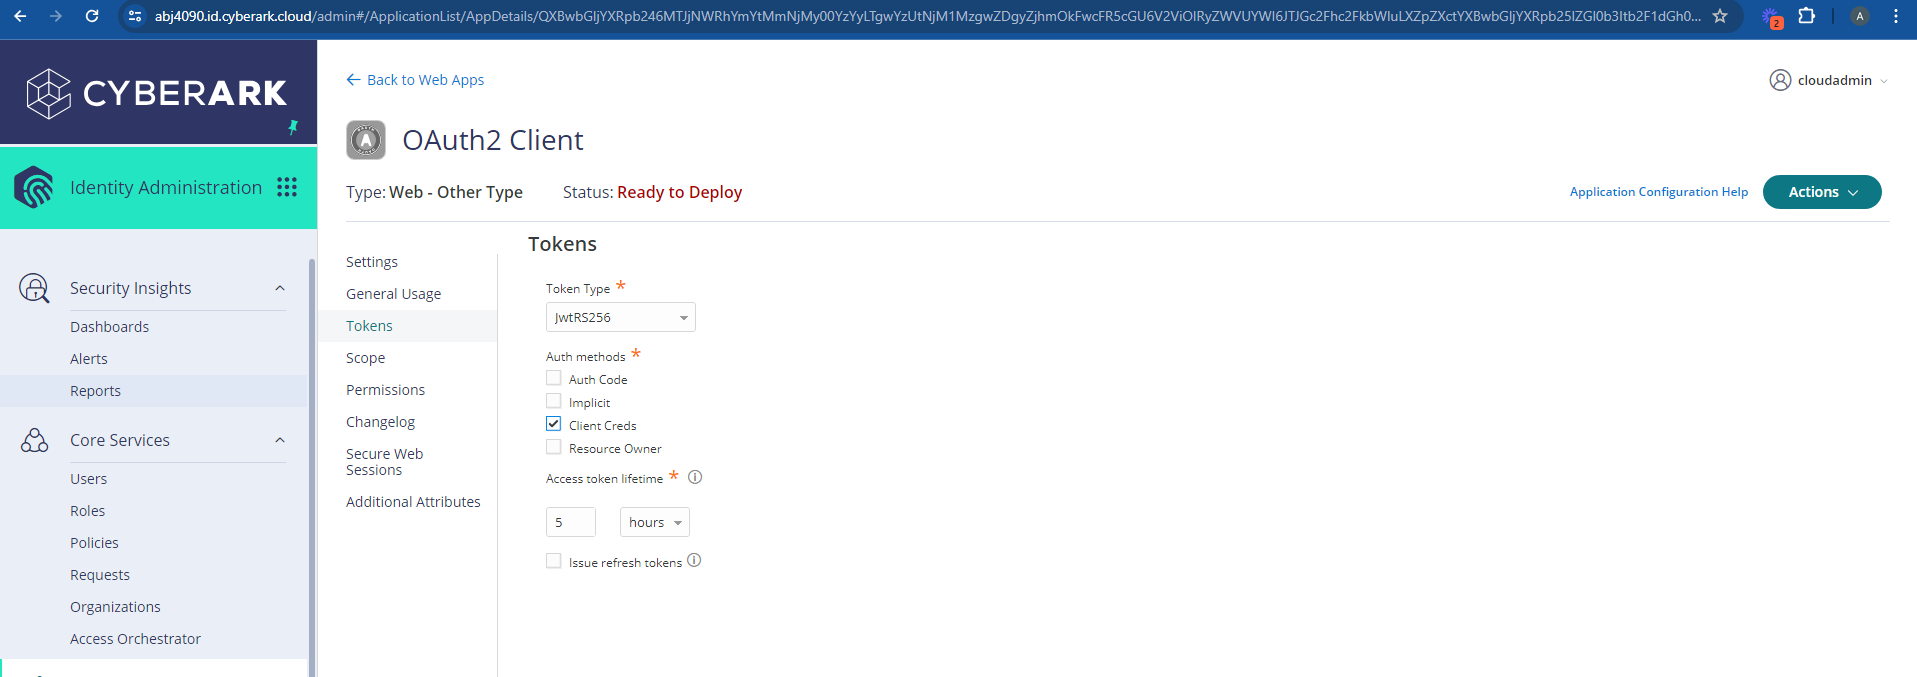
In the token page, select the Token Type to be jwt256 and select the Auth methods to be Client Creds
-
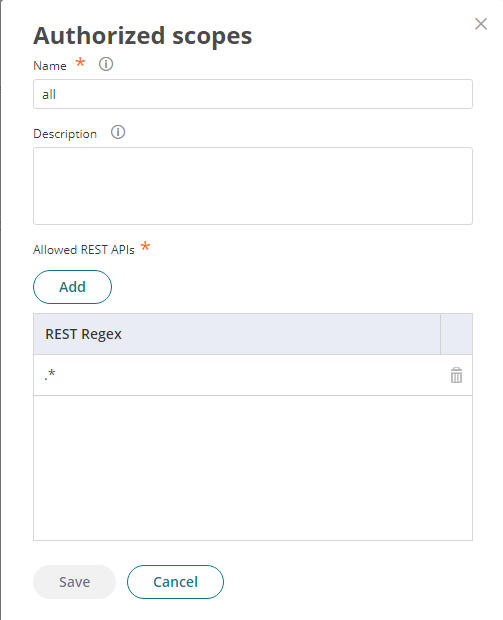
In the scopes page, add a scope as follows. Give the name as all and add .* as a regex. Note: please enter the scope name and regex exactly as shown
-
In the permissions page, add "System Administrator" role and make sure that all boxes are checked.
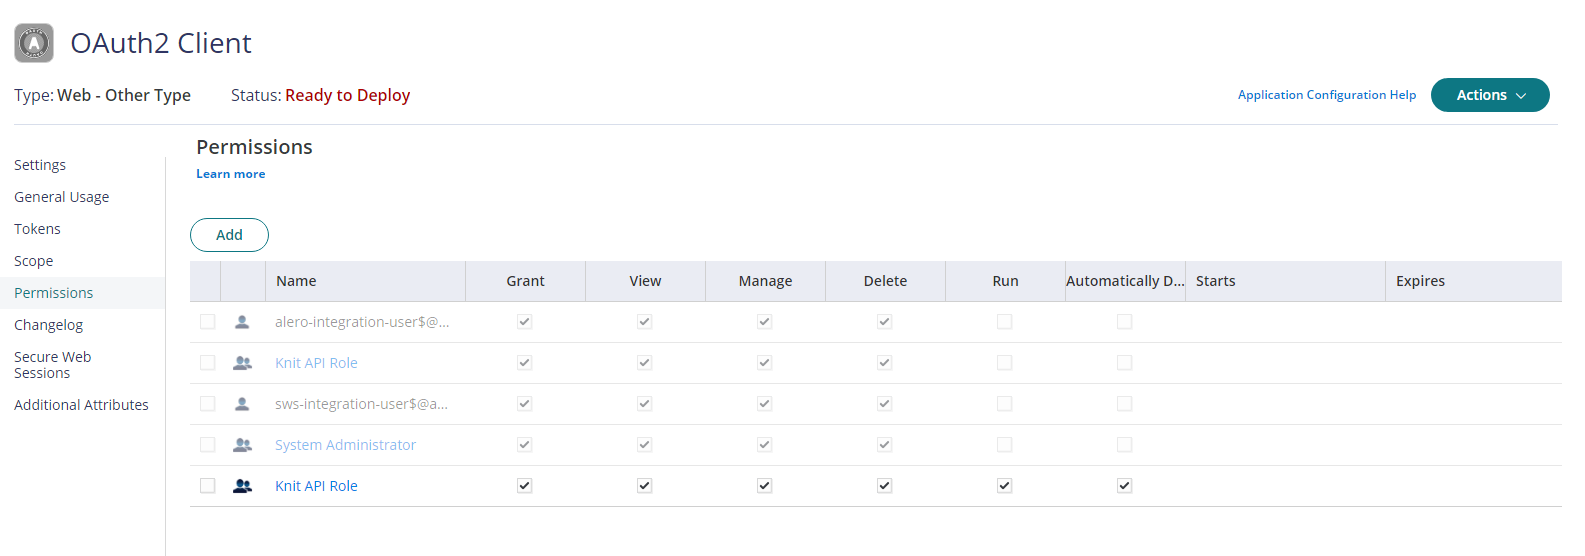
- Click on save
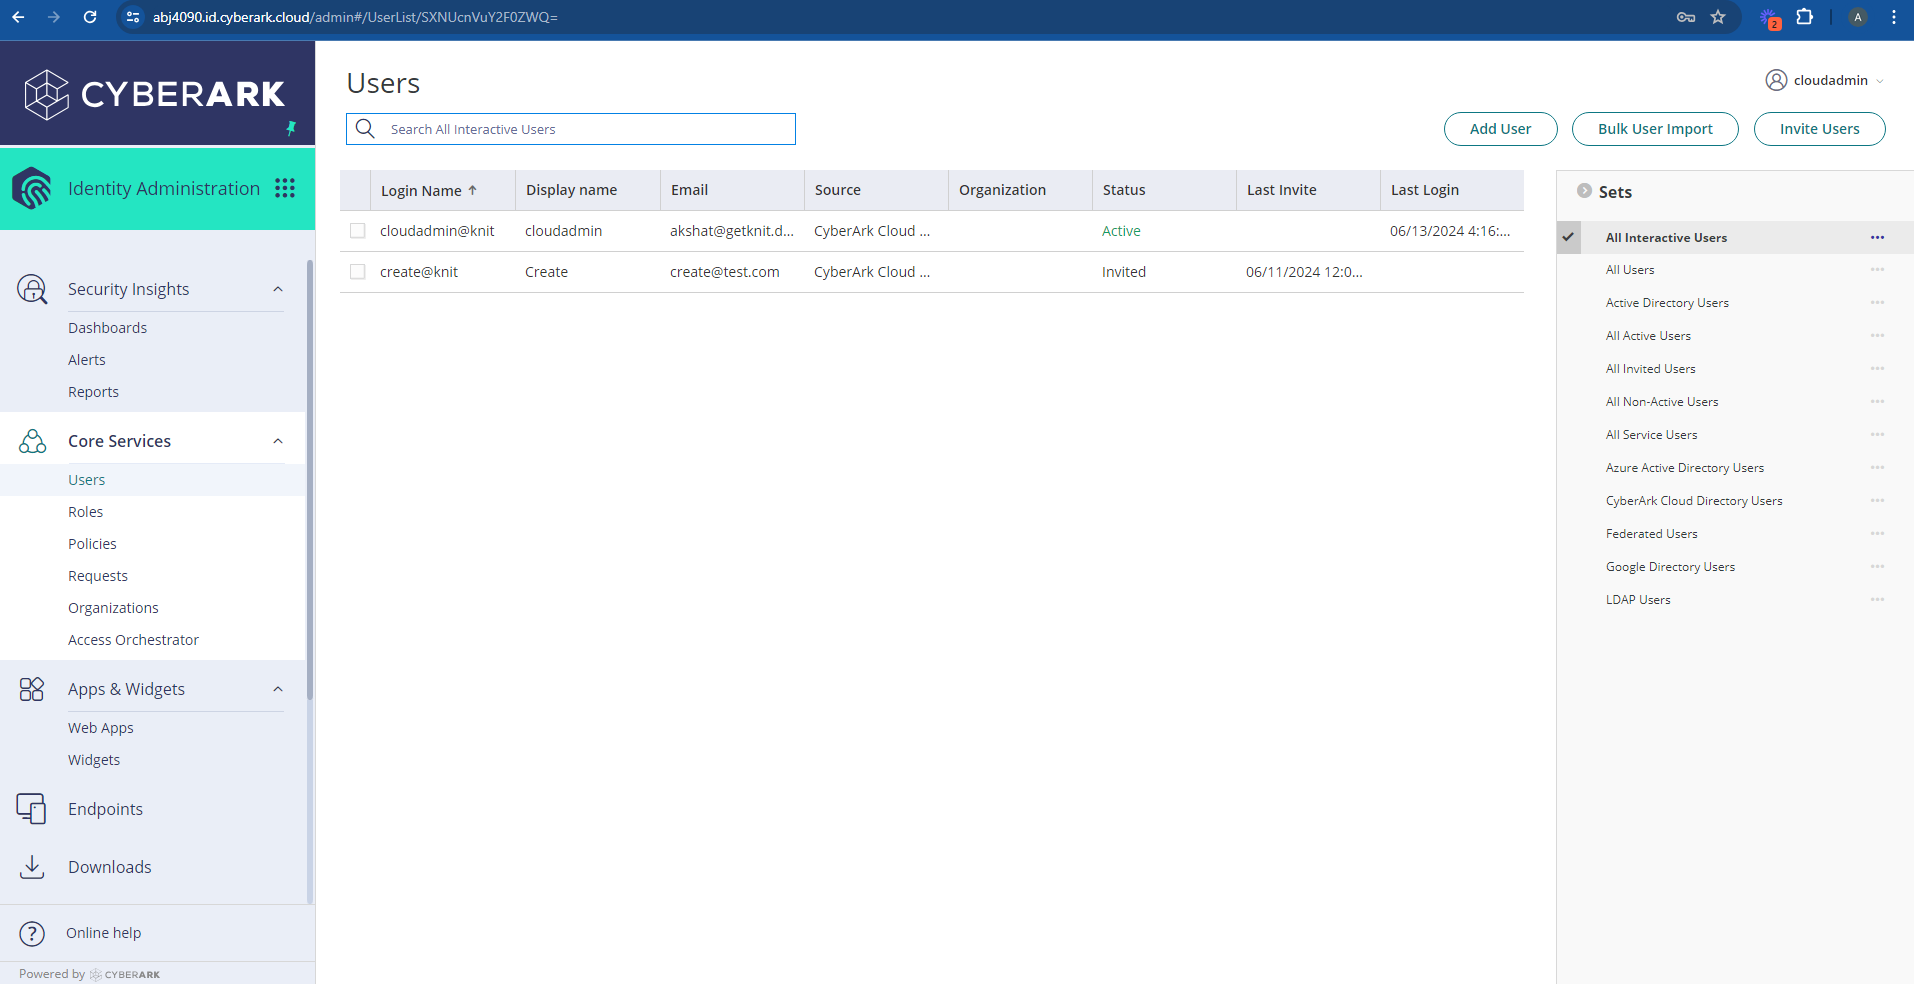
Create Service User
- In the Users page, click on Add User
-
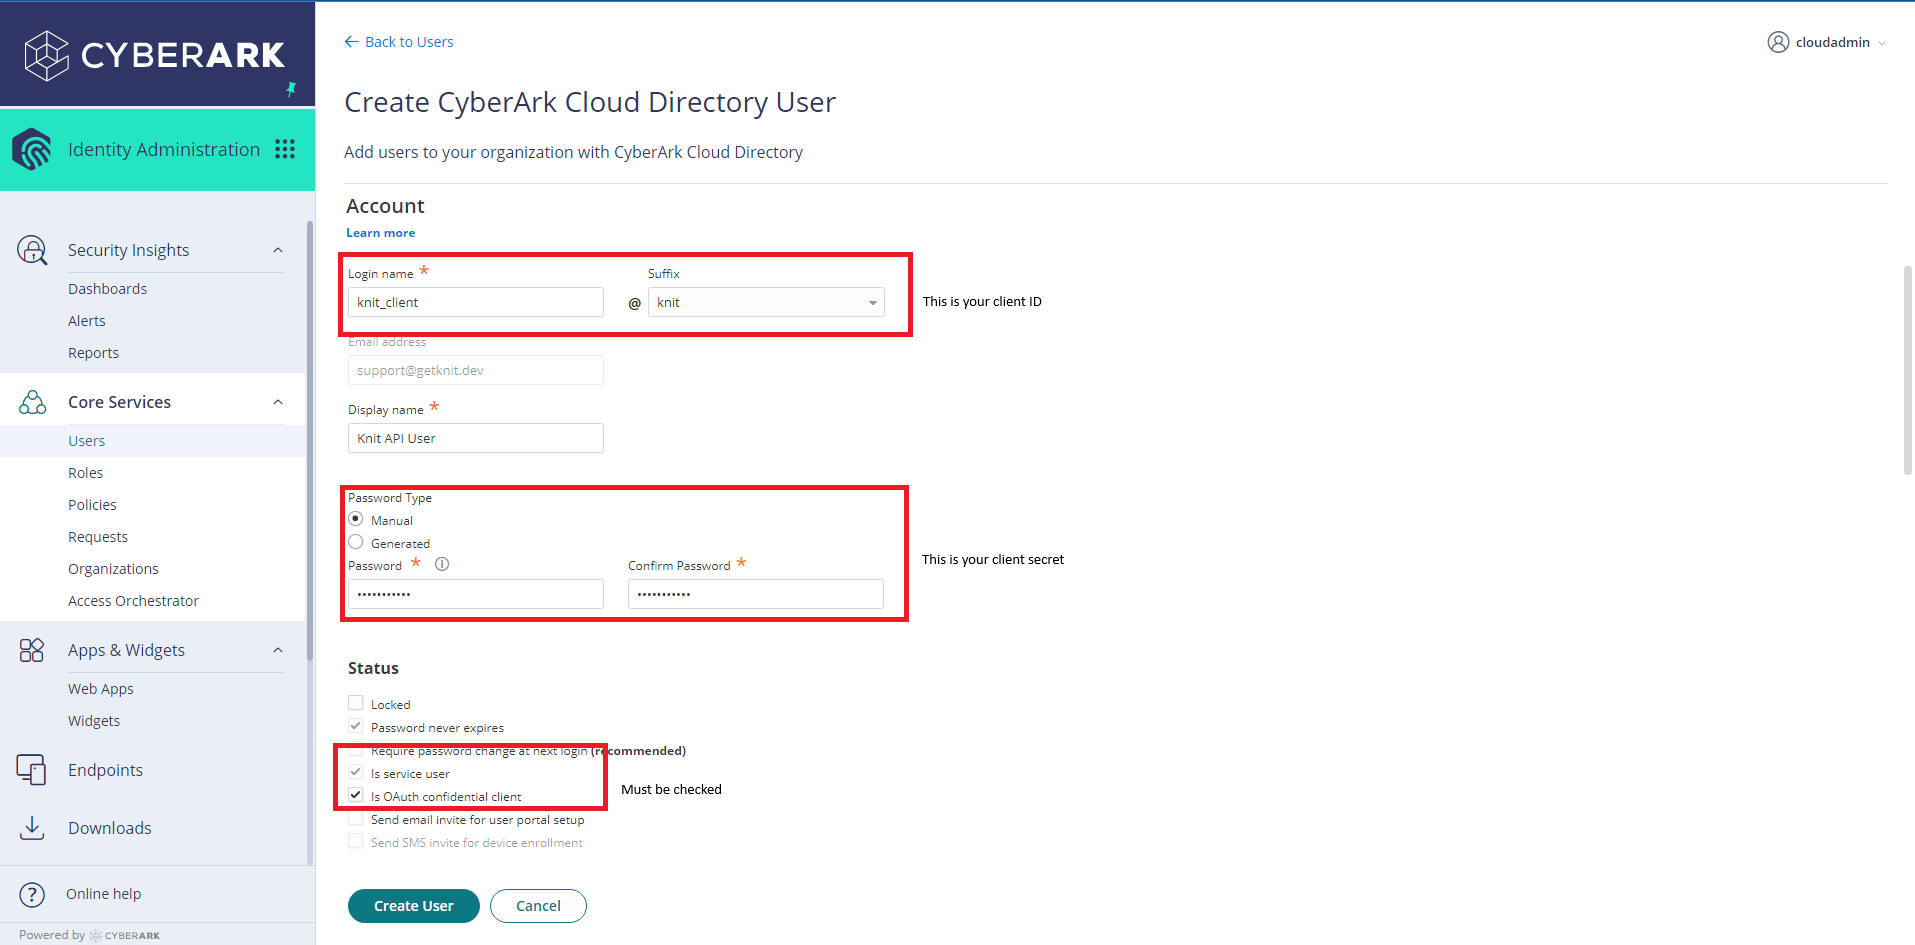
While creating a new user, complete the following fields:
- Add a login name. Your login name + suffix is your client ID
- Enter a password. This would be your client secret
- Check the Is Service User and is OAuth confidential client boxes
Modify Role
-
Go to the Roles page and select the System Administrator role
-
Go to Members and add the user we had created earlier
-
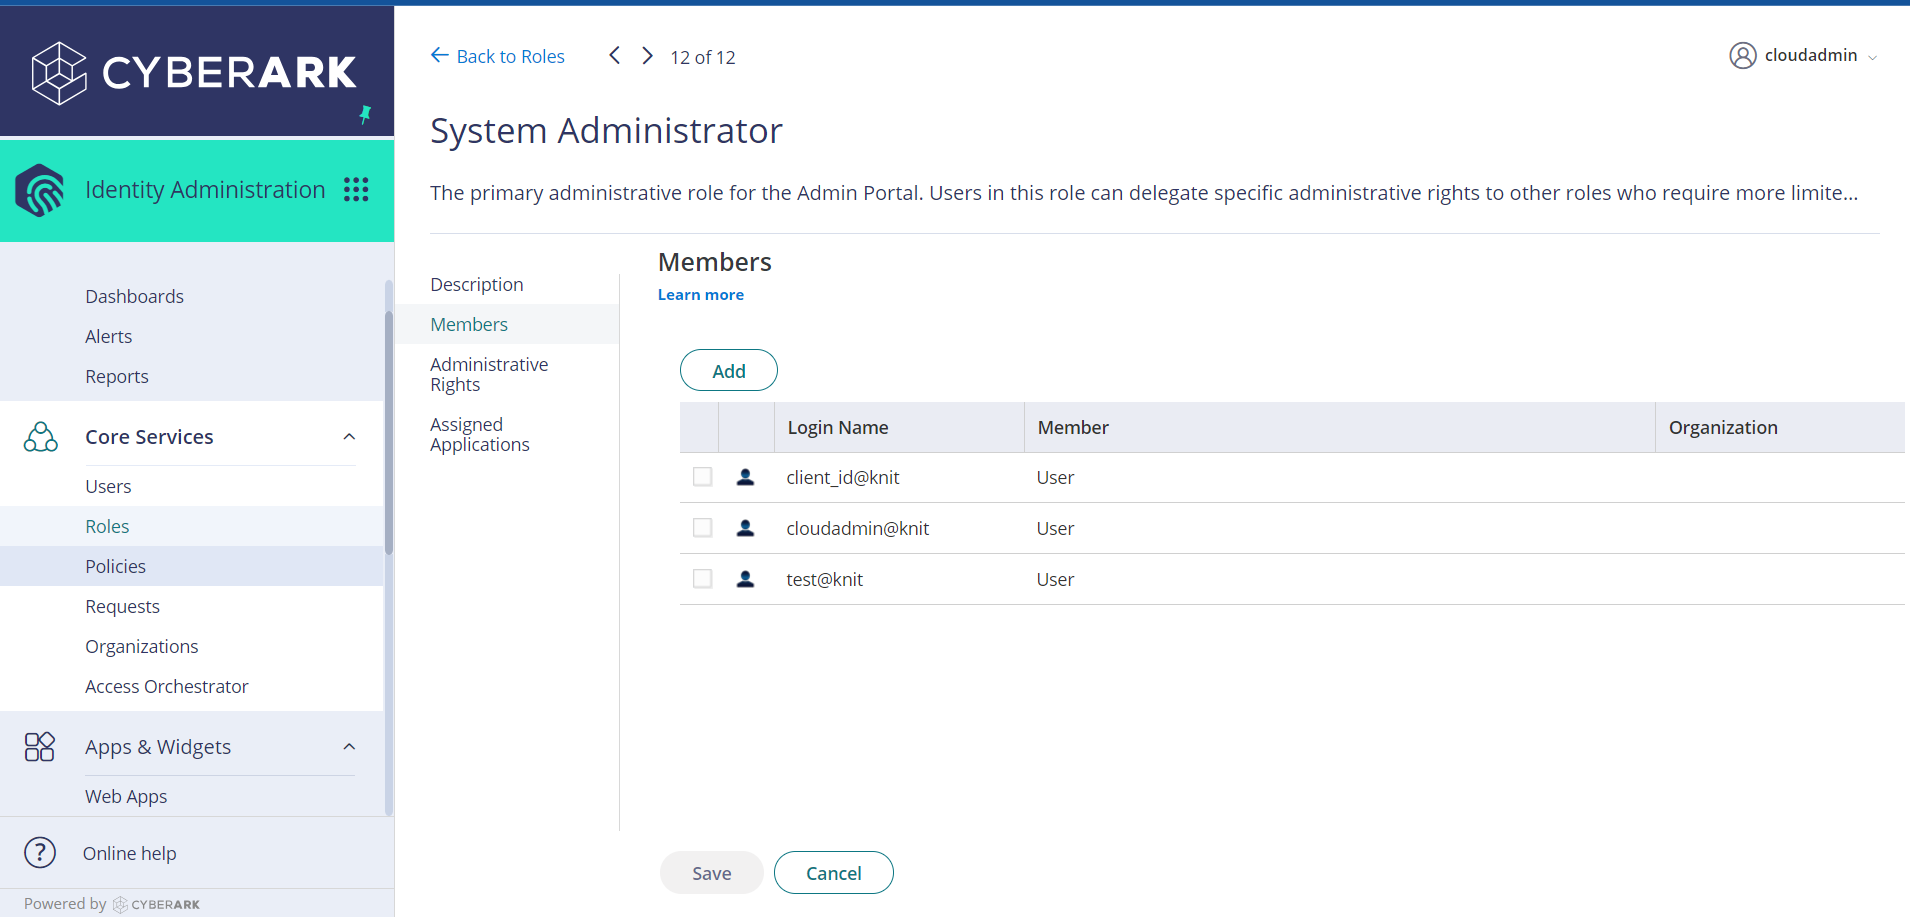
Go to Assigned Applications and add the OAuth2 Client we have just created if it is not already present
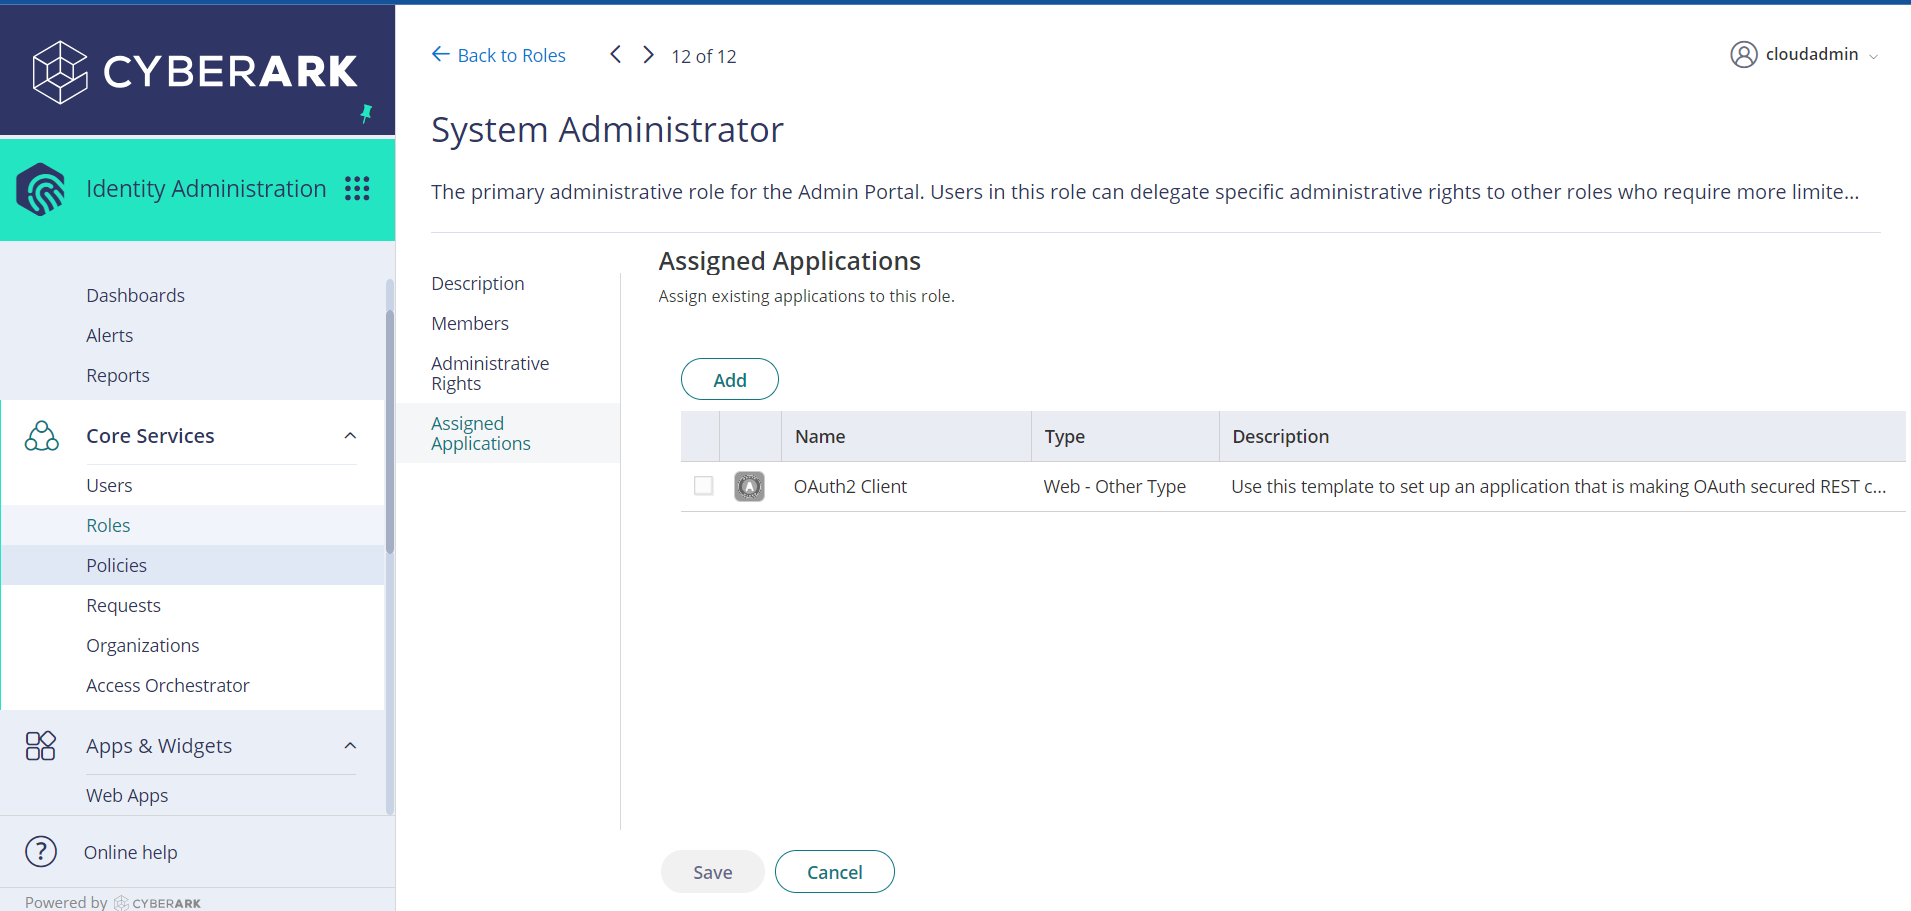
- Click on Save to save your changes
Adding credentials in the Knit UI Component
Once you have your app credentials, you can use those to integrate with CyberArk in the Knit UI Component
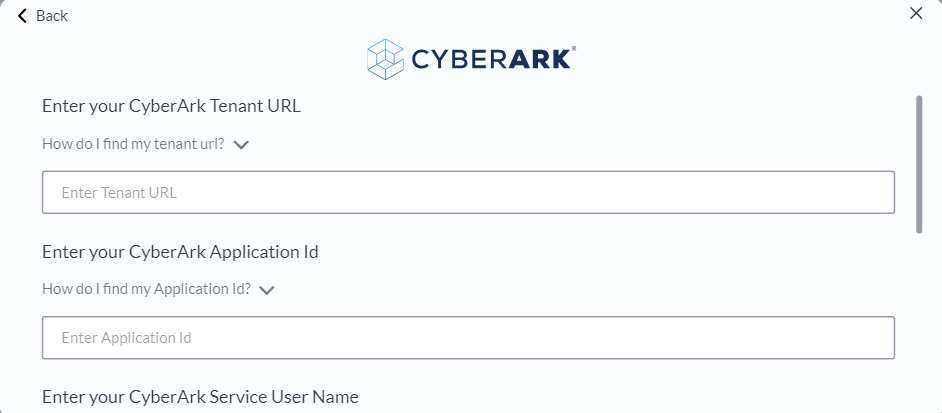
- Tenant URL: Enter the URL used to log into the CyberArk portal. For example, if sign in at https://abj4090.id.cyberark.cloud, then enter "abj4090.id.cyberark.cloud"
- Application Id: Enter the application ID that you specified while creating the OAuth web client.
- Service User Name: Enter the login name + suffix of the service user you had created. For example, knit_client@knit
- Service User Password: Enter the password of the service user you had created/
That's it! Click on submit, and if you've entered the correct credentials, then you should see that the Authorization has been successfully completed/
Updated about 1 year ago