How to Setup Knit
The Getting Started guide is your quick path to integrating with the Knit platform. In just a few steps, you’ll learn how to pick an integration category, set up webhooks, configure data models, and test your first connection. Whether you’re a developer building a production-ready workflow or a first-time user exploring the platform.
This guide will help you connect apps, sync data, and make API calls with Knit’s Unified API in under 30 minutes.
Build Your First Integration with Knit
Welcome to Knit! This guide will walk you through the basics of integrating an application using the Knit platform’s Unified API. We’ll cover each step - from choosing an integration category to testing your integration - in a simple, developer-friendly way. Whether you’re an experienced developer or new to integrations, this tutorial will help you get started quickly.
Follow along with the steps below (you can complete the whole setup in under 30 minutes), and refer to the Knit documentation placeholders we’ve included for more details on specific topics.
1. Choose a Category
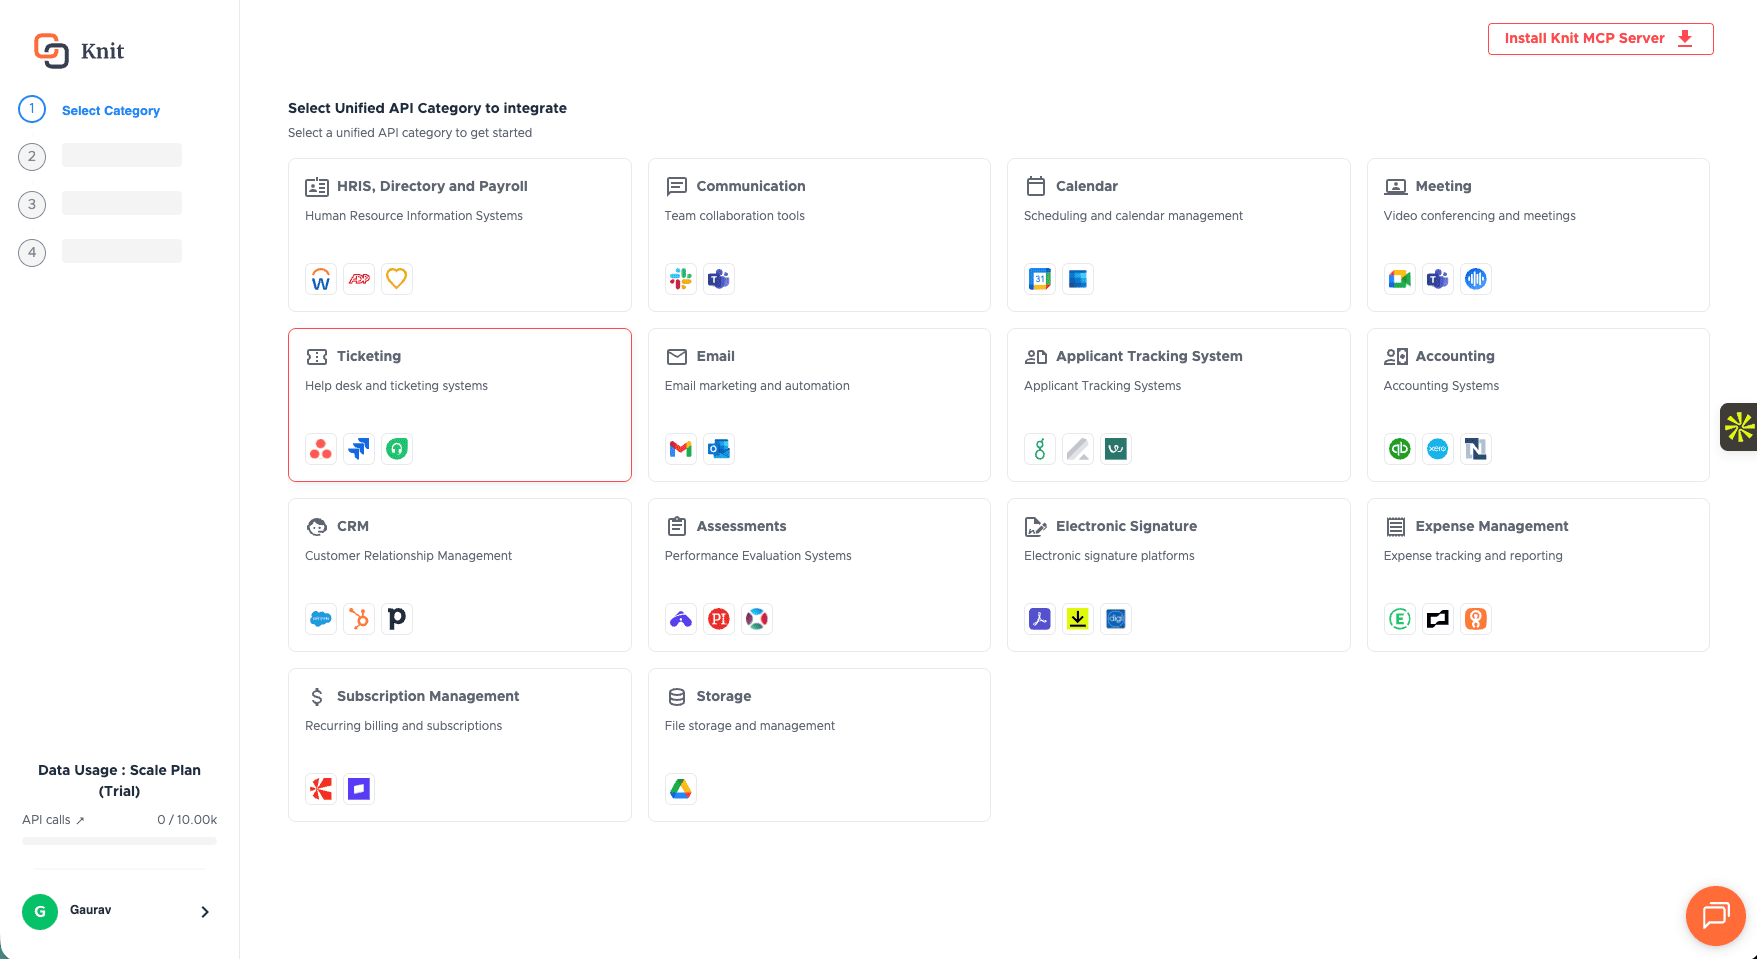
Selecting an integration category in the Knit onboarding wizard.
The first step is to choose a category that you want to integrate with. Knit supports multiple categories of business applications - for example, HRIS, CRM, Accounting, ATS, Communication, and more. Select the category that fits the type of application you plan to integrate (for instance, pick HRIS if you want to connect to an HR system). This selection tailors the getting-started experience to show you relevant data models and APIs for that domain.
Don’t worry if you’re interested in multiple categories - you can focus on one category to start, then later return to this step and explore another category via the Enable New Category button on your dashboard. The Knit dashboard allows you to revisit and launch the onboarding flow for a different category at any time. Picking a category simply helps Knit provide you with the appropriate integration workflow and examples for that type of software.
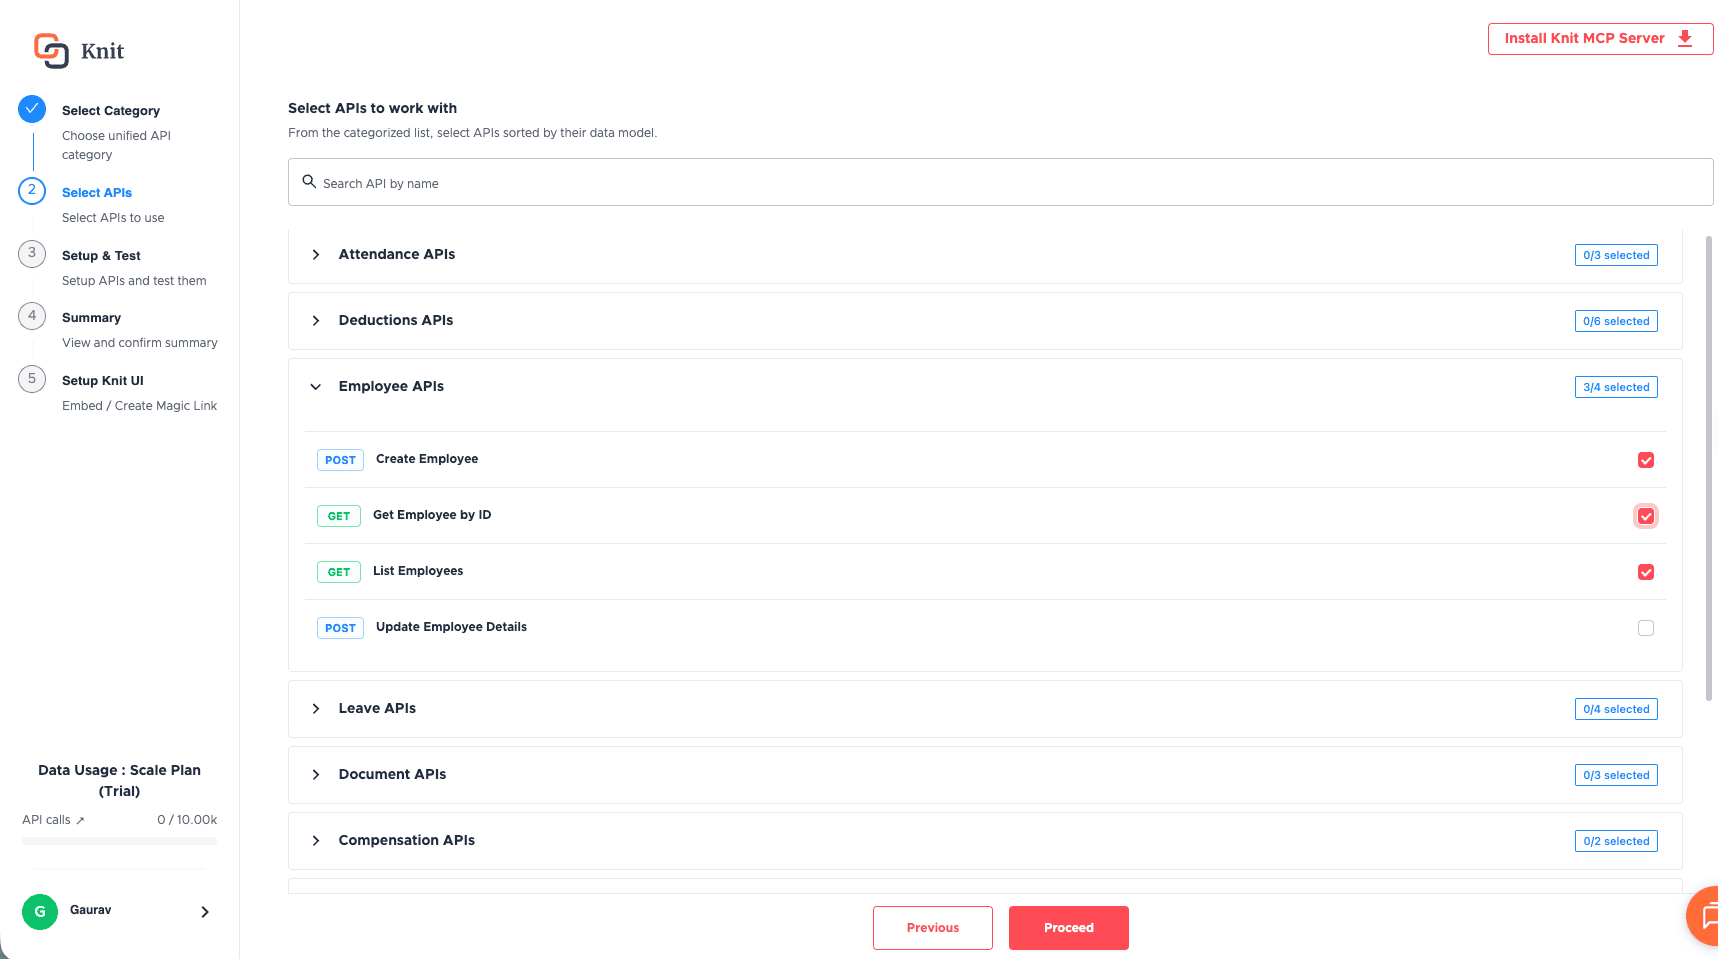
2. Select the Objects & APIs to Work With
You'd see a list of objects and respective APIs. Select the ones that are relevant for your use case / the ones you'd like to test with. You can always come back and change things as well.
3. Connect an APP & Test the APIs
Now that you've selected the APIs, you can connect any of the Applications (or use Knit's Playground app with dummy data) to test the APIs and their response structures.
If you don't have an account that you can use, you could sign up for a trial with some of the recommended apps mentioned below -
- HRIS - BambooHR
- ATS - Workable / Zoho Recruit
- CRM - Salesforce / Hubspot
- ERP / Accounting - Quickbooks Online / Zohobooks
4. [Optional] Set up a (Batch) Sync
Sync is a managed batch process that Knit runs at a frequency for you. It would automatically read data(you can configure fields/objects you'd want to track) and stream New / Delta in Data as webhooks to you. You can read more about it here Syncs in Knit
To set up a sync, you'd need to register a Webhook URL on Knit and ensure you handle different event types that Knit sends across
Many integration categories in Knit support data sync via webhooks, meaning Knit can automatically push data updates to your application. If the category you selected supports syncs (common for things like HRIS, ATS, CRM, etc.), you will be prompted to register a webhook URL where Knit should send data events.
Webhooks enable an event-driven (“push”) model - whenever there are new records or changes (e.g., a new employee in an HRIS or an updated deal in a CRM), Knit will deliver those updates to your endpoint in real time.
Provide a public endpoint URL from your application server to receive these events. If your chosen category does not use webhooks for data syncing (for example, some categories might rely solely on direct API calls), you can skip this step. (For detailed instructions on how to set up and secure your webhook endpoint, see the Register Webhook Documentation.)
Note: It’s important to set up the webhook before data syncs start, so that you don’t miss any incoming data. You can always change the webhook URL later in your settings if needed. If you are just experimenting and don’t have a public server, you might use a tool like ngrok to expose a local endpoint for testing webhooks.
Read more on the different Events here - Event Glossary
After setting up/entering your publicly available webhook URL, click the Next button. This webhook URL should accept POST HTTP requests.
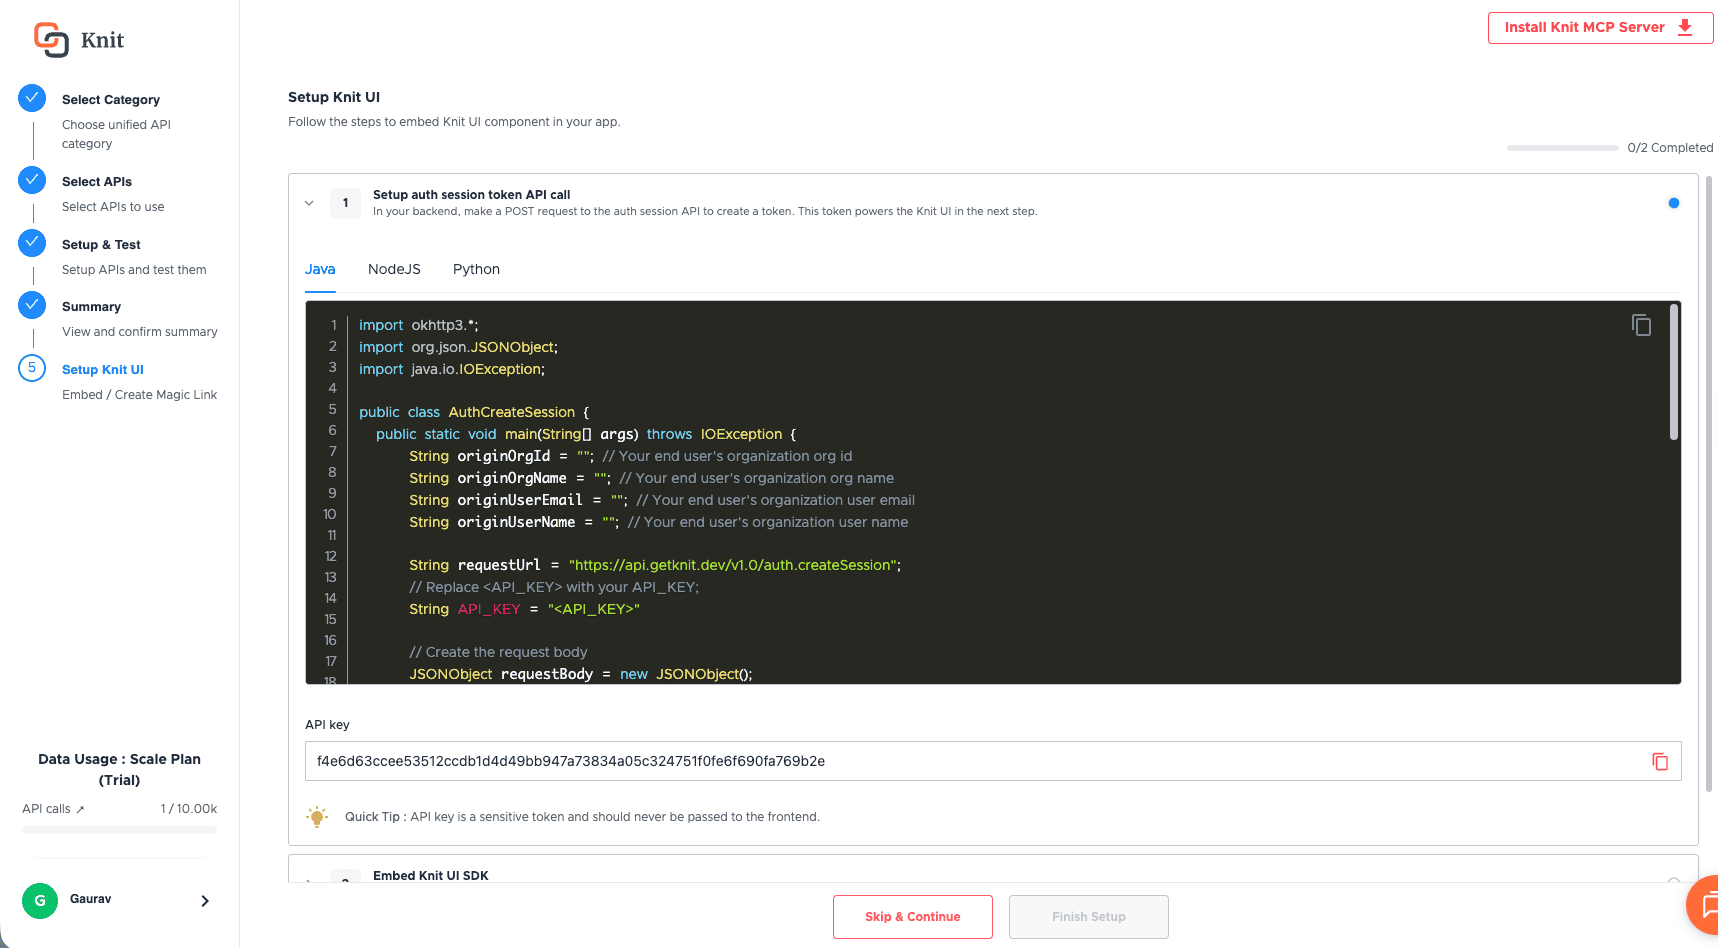
5. Set up Knit UI Component
After you've tested the APIs and set up a sync, it’s time to set up the Knit integration UI so your end user can connect their account. Knit provides a white-labeled embeddable UI component that makes it easy for users to authorize connections to third-party apps.
There are two ways to initiate an integration:
-
Embed the Knit UI in your application. In this approach, you’ll use Knit’s frontend SDK to embed a pre-built integration modal within your product’s interface. Your user stays in your app while completing the OAuth or credential authorization for the third-party service.
As part of this step, you will need to obtain your Knit API Key (from the Knit Dashboard) and use your backend to create an authentication session for your end user. The Auth Session creation API will return a token or magicLink needed to launch the embedded UI.
After that, you can initialize the Knit UI widget in your frontend using a few lines of code. Knit’s UI component is fully customizable to match your app’s look and feel. (For a complete walkthrough on embedding the integration widget – including code samples for React, Vanilla JS, etc. - see the setup Knit UI component guide.
-
Use a Temporary Magic Link to Authorize
If you prefer not to embed a UI component, or you want a quicker way to test the flow, Knit also offers a Magic Link option. Magic Link is a specially generated URL that you (or your user) can open in a browser to complete the integration flow on a Knit-hosted page.
If you plan to use a magic link you can skip the embedding and click on Finish Setup
Later,You can create a Magic Link via the Knit Dashboard by providing a few details – such as the end user’s organization ID, the user’s name and email, and the category of integration.
The dashboard will then give you a unique link. When opened, this link walks the user through connecting their app (similar to the embedded UI flow) in their browser. This is handy for quick demos or if you want to offload the integration UI outside of your product.
See the Magic Link guide for more details on how to generate and use Magic Links
In both cases, whether you embed the UI or use a Magic Link, the end result is the same: your user will authorize an app (e.g., log in to their Salesforce, Workday, QuickBooks, etc. account through Knit’s flow), and Knit will establish a secure connection to that third-party application on your behalf.
Once this completes, you’ll receive a confirmation (either via a callback or redirect in the embedded flow, or via the Magic Link completion page), and critically, you’ll obtain an Integration ID for the newly created integration.
Integration ID
An Integration ID is a unique identifier that Knit generates whenever a user successfully connects an application (through the embedded UI or Magic Link). This ID is very important – it represents the specific integration instance (the combination of your user + the app they connected) in all future interactions.
You can think of the Integration ID as a handle for the connected account. You will use it to make API calls targeting that integration, and Knit will include this ID in any webhook events it sends to you for that account.
For example, if one of your customers connects their QuickBooks account via Knit, you might get an Integration ID like int_abc123. When you later request data (or receive sync webhooks) for that QuickBooks integration, the messages will reference int_abc123 so you know which account the data belongs to.
Make sure to store the Integration ID (e.g. in your database) when you receive it. Typically, you’ll get it as part of the redirect/callback from the embedded flow or in the webhook payload when the initial sync starts.
Every API request you make to Knit’s endpoints will include this ID (often as a path parameter or header) to specify which integrated account you are querying or updating.
Next Steps
You can now start making API calls to use Knit fully. You can refer to our API reference from the table below.
| Category | API Reference |
|---|---|
| HRIS (Workday, Successfactors, BambooHR, etc) | https://developers.getknit.dev/reference/employee-data-model-4 |
| ATS (Greenhouse, Lever, Workable, etc.) | https://developers.getknit.dev/reference/application-data-models |
| CRM (Salesforce, Hubspot, Pipedrive, Attio, etc) | https://developers.getknit.dev/reference/account-data-models |
| Accounting / ERP (QBO, Xero, Netsuite, etc.) | https://developers.getknit.dev/reference/accounts-data-models |
| All Categories | https://developers.getknit.dev/reference/api-environment |
Testing Integrations with Integrated Account Types
Before rolling out to production, you’ll want to test your integration thoroughly. Knit provides a sandbox environment and flexible account settings to facilitate testing:
-
Knit Sandbox & Free Trial: When you first sign up, you’ll typically start in a sandbox mode (often as part of a free trial). This allows you to play with integrations without incurring charges.
In the sandbox, any integrated accounts you create will be marked as Test by default. Test integrated accounts are not billed and are meant for development and QA purposes.
During the free trial, there may be limits on how many test accounts you can create (for example, an account may allow up to 3 test integrations at a time) and how long they remain active (commonly, test accounts expire after 30 days).
These limits ensure that the free sandbox is used for evaluation and not long-term production use. If you need more time or more test accounts, you can always contact Knit to extend the trial or consider a paid plan.
-
Paid Sandboxes: For teams that require extended testing or multiple sandbox environments, Knit offers paid options. On a paid plan, you can still create **Test integrations **as needed, but you won’t be constrained by the strict limits of the free trial.
Paid sandboxes are great for simulating enterprise scenarios, running integration tests, or building proof-of-concepts before going live. The Knit platform will still differentiate test vs. production accounts (see below), but you have more flexibility and no automatic expirations on test data when you’re in a paid development environment.
-
Test vs. Production Integrated Accounts: Every integration in Knit is labeled as either a Test account or a Production account. Test accounts, as noted, are for non-production use: they do not count toward billing, and you should use them for development, debugging, and demo sessions.
Production accounts are intended for real, live customer data and are billed according to your plan. By default, Knit marks all new integrations as Test initially - this way you won’t accidentally incur charges while building.
You can explicitly choose an account type during integration setup (for example, there’s a toggle when creating a Magic Link or a flag in the Auth Session API) to mark an integration as Production from the start Unlike Test accounts, Production accounts do not expire or auto-delete - they remain active until you manually deactivate or delete them, and there is no limit on the number of Production accounts you can have.
-
Converting between Test and Production: Knit makes it easy to change an integration’s status when you’re ready. If you have a Test integrated account that you now want to use in production (e.g., a customer started in sandbox mode and is now going live), you can convert it to Production.
This conversion can be done either via the Knit Dashboard (there’s an option on the Integrated Accounts page to switch the account type)or via an API call.
In the API, when creating an auth session for a new integration, you can set a parameter like
testAccount=falseto create it directly as a Production account. Or, for an existing integration, Knit may provide an endpoint, or you can re-create the session with the desired flag.Converting an account ensures that it won’t expire and will count toward billing going forward. Conversely, you could take a Production account and mark it as Test (for example, if you’re moving a client back into a trial mode), although this is less common.
(See the [Integrated Account Types] documentation for more details on how to switch account types and any limitations.)
During testing, it’s a good idea to use realistic but non-production data. Many third-party apps offer sandbox credentials or demo environments - you can integrate those through Knit to see how everything works without touching real customer data.
Also, remember that Test accounts will automatically deactivate after 30 days on the free plan. If a test account expires, you can simply create a new test integration with the same app to continue testing (Knit may require a new originOrgId if using the same app credentials again)
Tip: Use Test accounts for demos and development. Switch to Production when you’re ready to handle live data.