

Service App
With Service App, Knit connects to Okta machine-to-machine. No user sign-in is involved. You create an API Services app in Okta, authenticate it with a public/private key pair, and give it an admin role. Because it doesn't depend on an individual user, the integration keeps working when admins leave or change roles.
Not sure this is the right option? See Integrating with Okta for a comparison with User OAuth.
Steps to create the service app in Okta
1. Sign in to Okta
- Log in to your Okta Admin Console as an admin.
2. Create an app integration
- Navigate to Applications and Resources > Applications.
- Click Create App Integration.
- Select the Classic Experience tab.
3. Select the app integration type
-
Choose API Services as the Sign-in method.
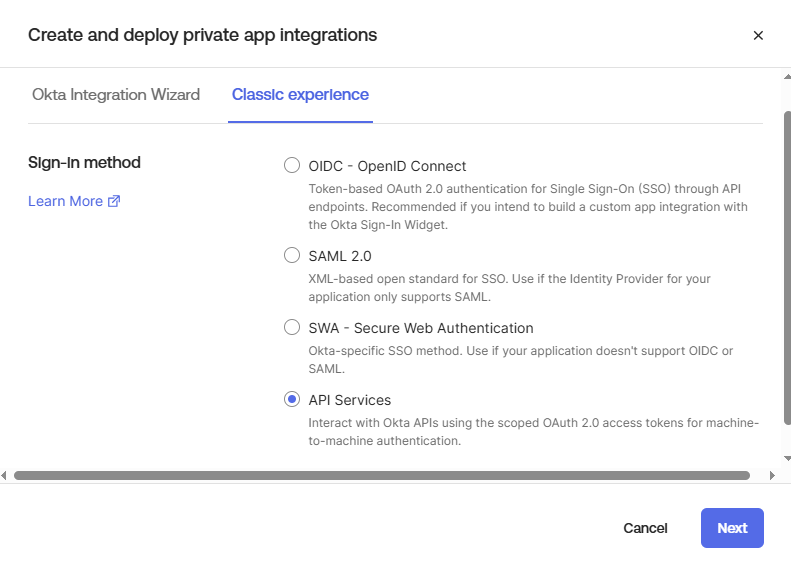
4. Fill in the integration details
- Enter an App integration name.
- Select Use Okta-generated client ID.
5. Save the integration
- Click Save.
6. Generate a key pair
-
In the app's General tab, scroll to Public Keys.
-
Click Add Key, then Generate New Key.
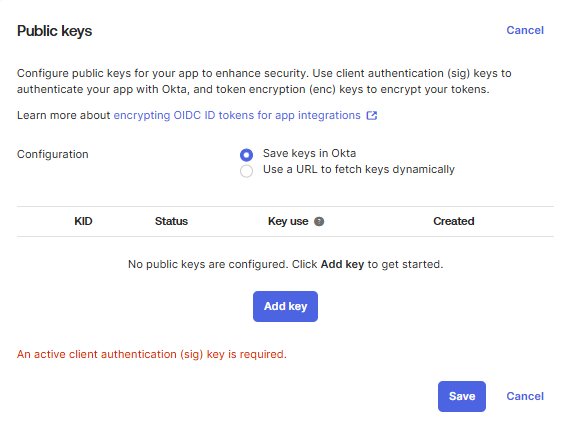
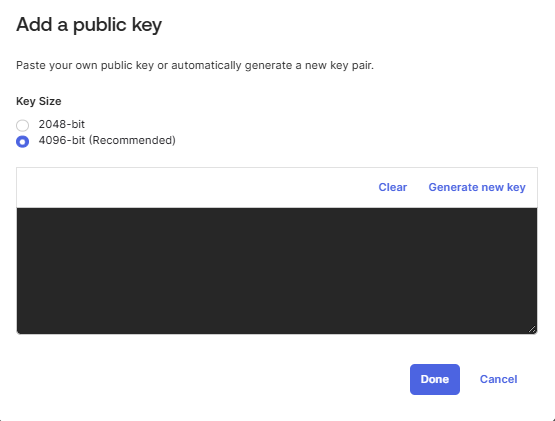
-
Copy the generated private key (JSON) and store it securely.
Important: Okta shows the private key only once. Save it before you continue. You'll need it in Knit.
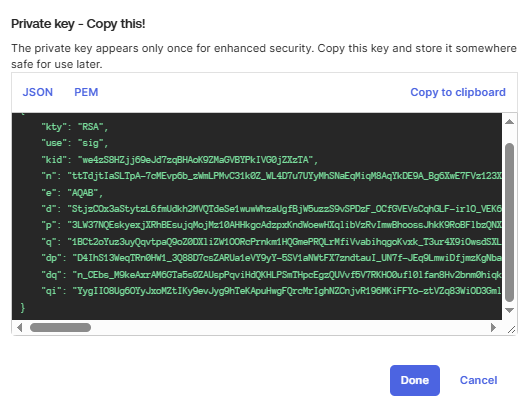
-
Click Done, then Save.
7. Configure client authentication
-
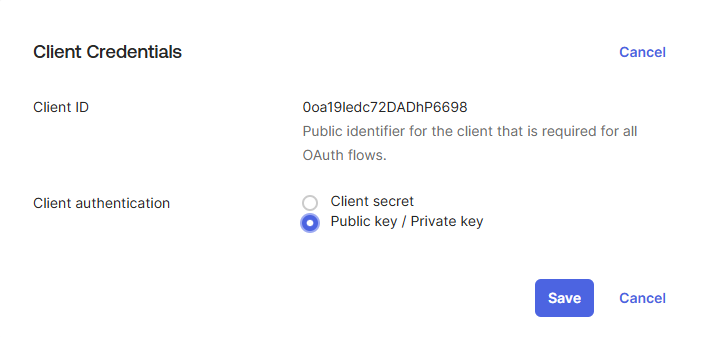
Scroll to Client Credentials.
-
Set Client authentication to Public key / Private key and save.
-
Copy the Client ID and store it securely. You'll need it in Knit.
-
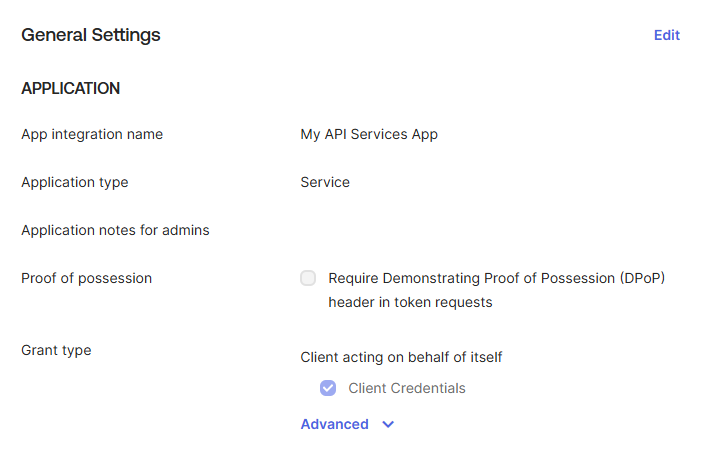
In General Settings, disable Proof of Possession (DPoP).
8. Configure API scopes
- Open the Okta API Scopes tab.
- Grant the okta.users.read scope.
9. Assign an admin role
-
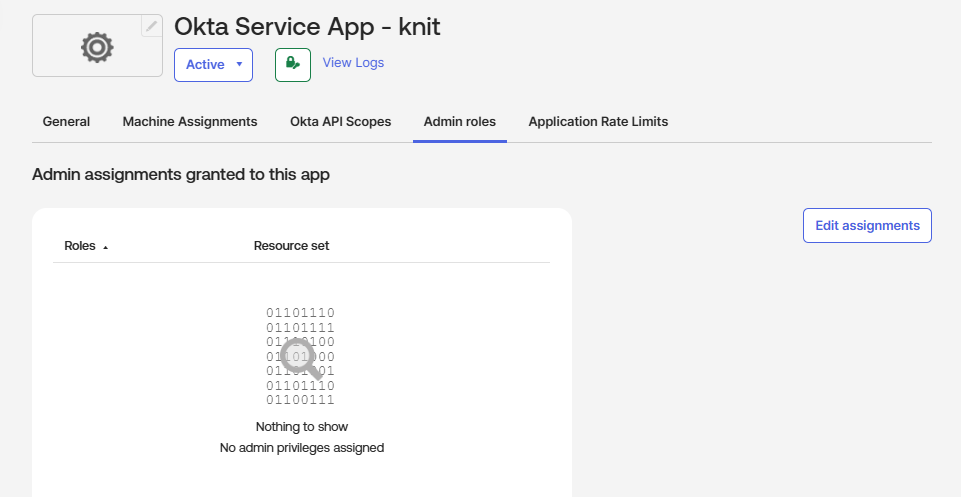
Open the Admin roles tab.
-
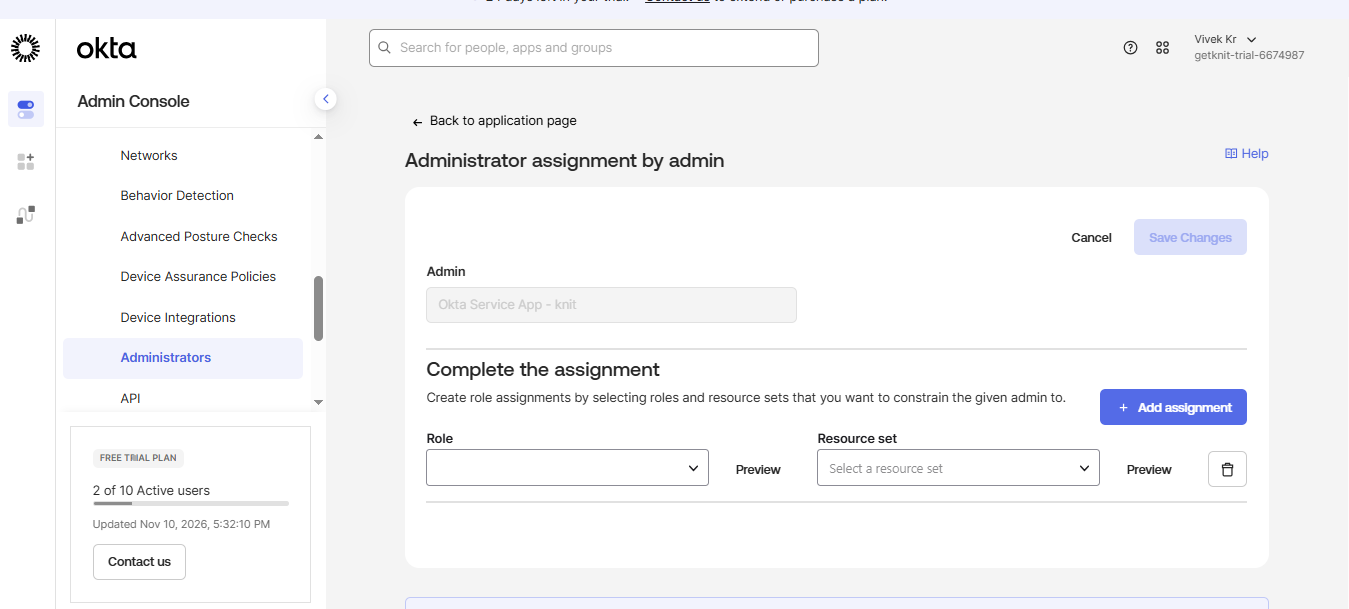
Click Edit assignments.
-
Assign the Read-Only Administrator role, or a higher role if you need the manage scopes.
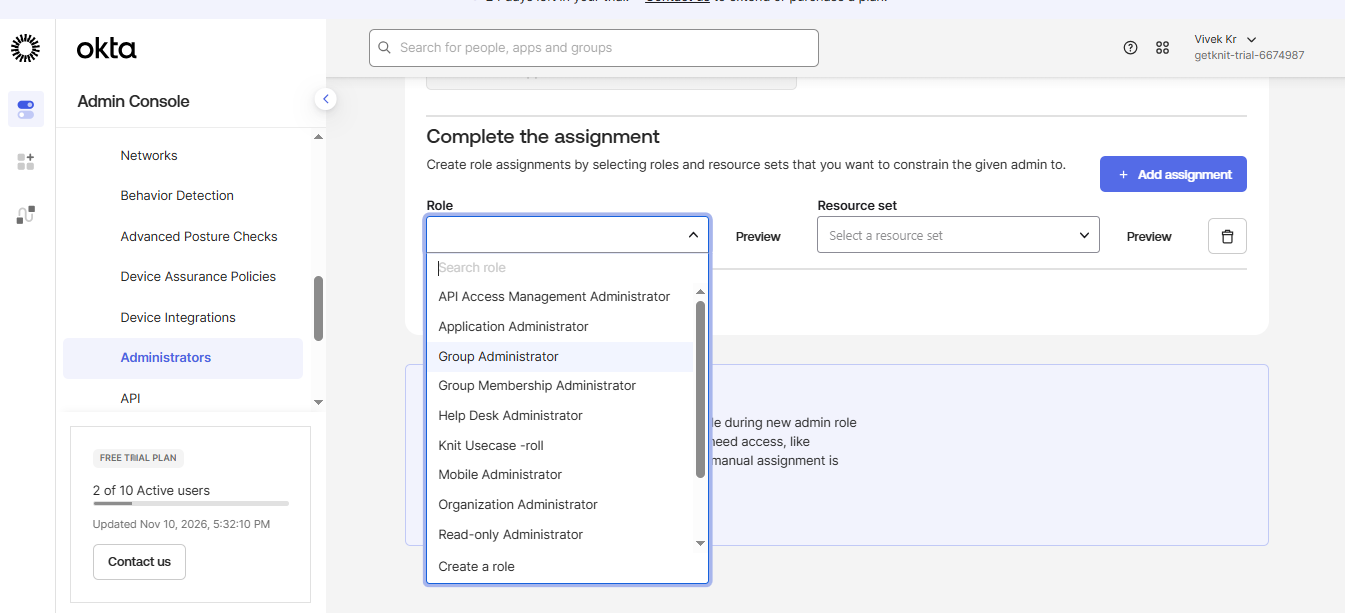
-
Click Save Changes.
Connect in Knit
- In the Knit integration flow, choose HRIS, Directory and Payroll → Okta.
- Set Okta Authentication Type to Service App.
- Enter the Client ID, the private key (JSON) and your Okta URL. If you want to sync only users assigned to a specific Okta app, also fill in Application ID to filter users (see below). Then submit.
Reference: a video walkthrough of these steps is available here: Loom video.
Optional: sync only users assigned to a specific application
By default, Knit syncs all users from your Okta directory. To sync only the users assigned to one Okta application, use the optional Application ID to filter users field in Knit.
1. Grant the okta.apps.read scope
- In the app you created above, open the Okta API Scopes tab.
- Grant the okta.apps.read scope in addition to okta.users.read.
2. Find the Application ID
- Navigate to Applications and Resources > Applications.
- Open the app whose assigned users you want to sync.
- Copy its Application ID from the URL or the app details page.
3. Enter it in Knit
- When connecting in Knit, paste the ID into Application ID to filter users (Optional). Knit then syncs only users assigned to that application.
Optional: enable okta.users.manage with phishing-resistant 2FA
To create, update, or terminate employees through Knit, grant the okta.users.manage scope in step 8 as well, and assign an admin role that allows managing users in step 9. Okta recommends setting up phishing-resistant 2FA for this.
1. Update the authentication policy
-
Navigate to Security > Authentication Policies.
-
Open the Any Two Factors policy.

-
Edit the Catch-all Rule.

2. Set possession factor constraints
-
Under Possession factor constraints, enable Phishing resistant.
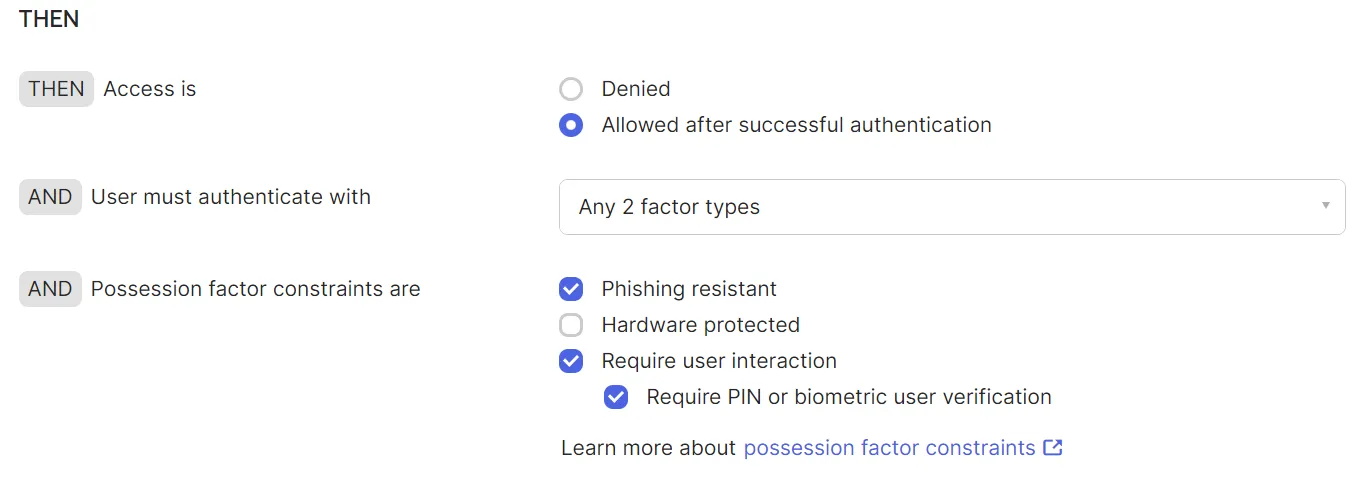
3. Add a phishing-resistant authenticator
- Navigate to Security > Authenticators.
- Add FIDO2 (WebAuthn) as an authenticator.
You're now set up with phishing-resistant 2FA for the employee management APIs.
Updated about 9 hours ago