

Twenty
Twenty Integration Guide
Authentication Type
Twenty Supports two types of authorization.
- API Key
- OAuth.
API Key authorization flow is used by default, to use the OAuth flow refer the OAuth section below for more details.
API Key
-
Log in to your twenty workspace.
-
From the dropdown beside your workspace name on top left corner, click Settings.
-
Click the MCP & APIs tab.
-
Click + Create API Key.
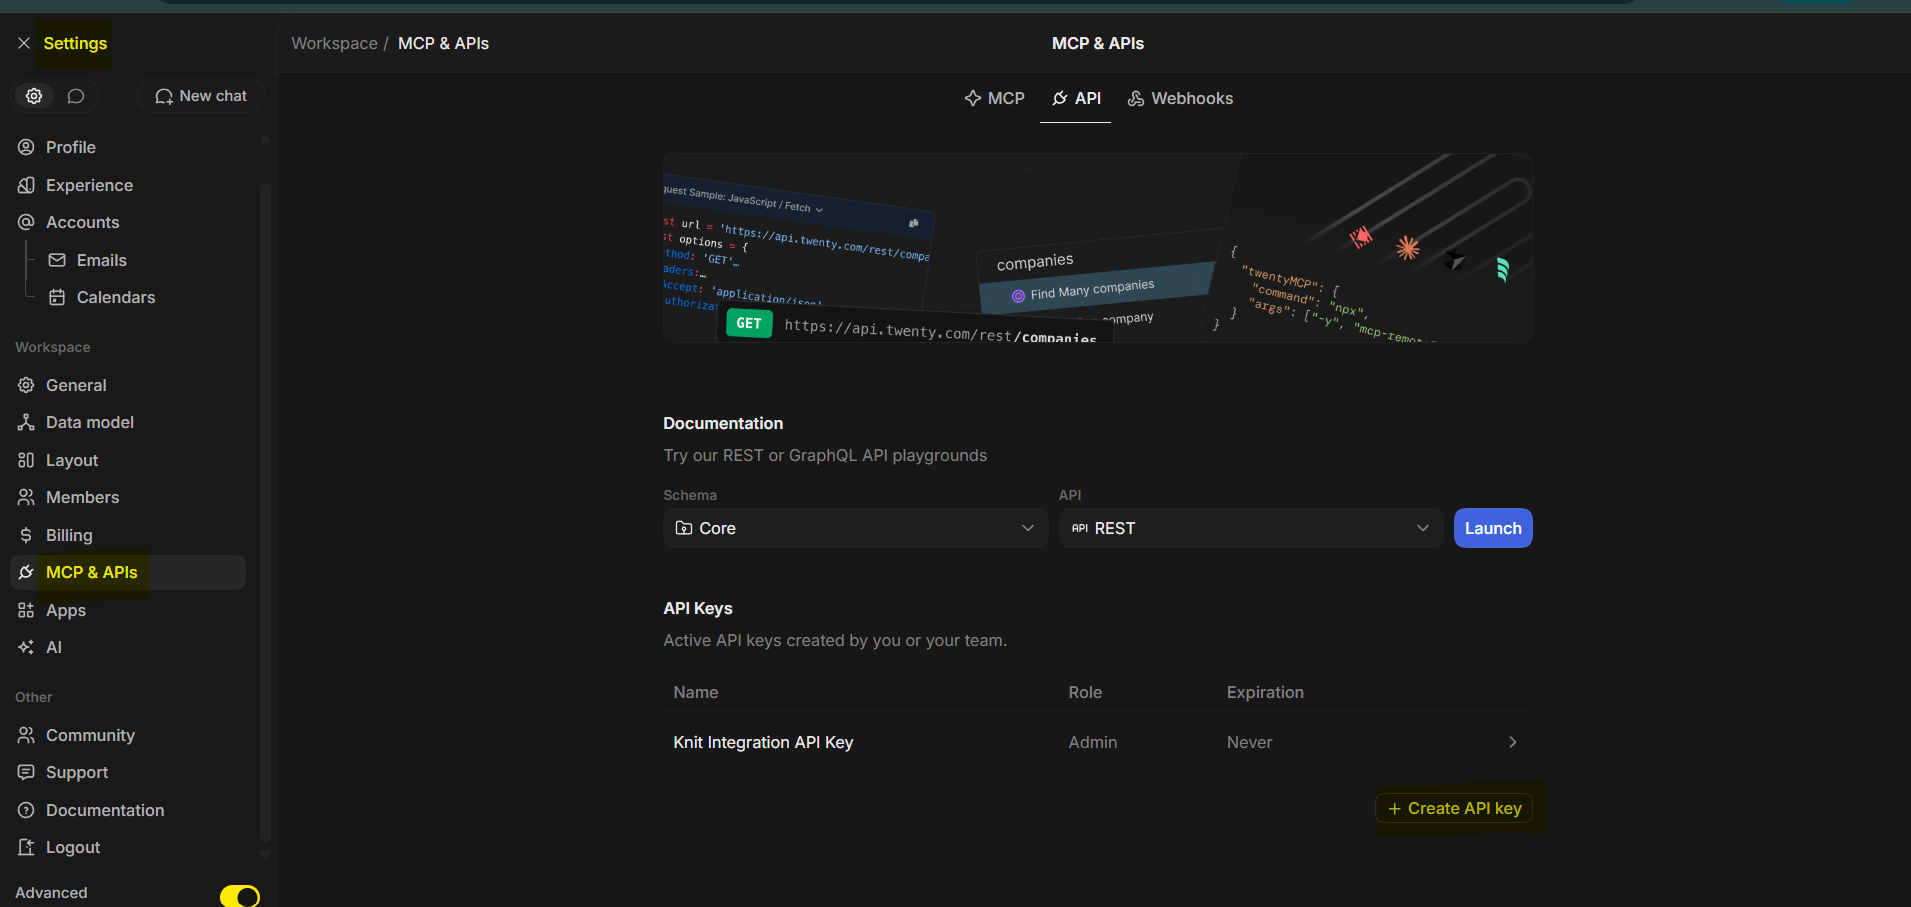
-
Give the API Key a name, set the role as Admin.
-
Set the Expiration date based on your requirement and click Save.
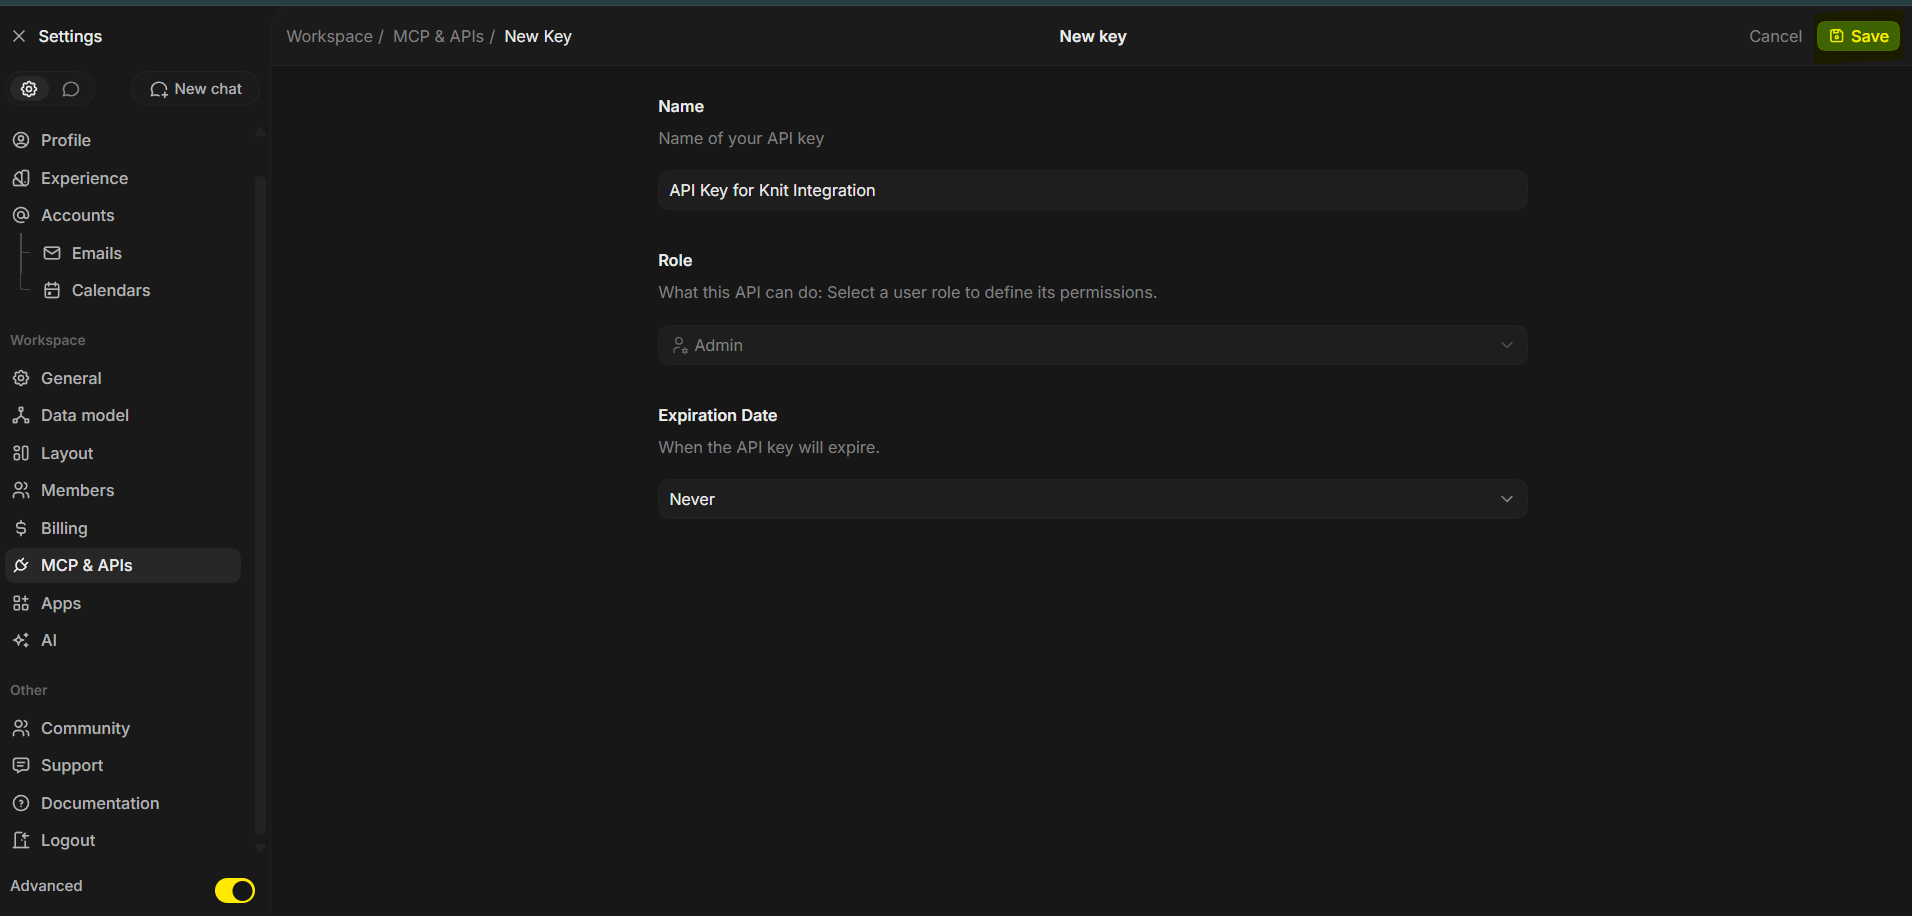
-
Copy the API Key and use it during integration setup.
OAuth
By default, API Key authorization flow is used, to use the OAuth flow follow the below steps.
-
Register an OAuth Client
Use the following request to register your app as a public client
curl --location 'https://api.twenty.com/oauth/register' \
--header 'Content-Type: application/json' \
--data '{
    "client_name": "Your App Name",
    "redirect_uris": [
        "https://app.getknit.dev/oauth/authorize"
    ],
    "grant_types": [
        "authorization_code",
        "refresh_token"
    ],
    "token_endpoint_auth_method": "client_secret_post"
}'
For more details on public client creation refer twenty docs.
The response for above request would look like,
{
    "client_id": "2697931d-9105-4475-a49e-6346788c1535",
    "client_name": "Your App Name",
    "redirect_uris": [
        "https://app.getknit.dev/oauth/authorize"
    ],
    "grant_types": [
        "authorization_code",
        "refresh_token"
    ],
    "response_types": [
        "code"
    ],
    "token_endpoint_auth_method": "none",
    "scope": "api profile",
    "client_id_issued_at": 1784444272,
    "registration_client_uri": "https://api.twenty.com/oauth/register/2697931d-9105-4475-a49e-6346788c1535"
}
Use the
client_idfrom the above response in the next step.The client_id is deleted by twenty, if there is no account linked through it for 30 days.
Once at least one user authorizes through this client_id, it is permanently linked and will not be deleted. -
Register OAuth Credentials
Use the following request to register the credentials in knit
curl --request POST \
     --url https://api.getknit.dev/v1.0/oauth.creds.register \
     --header 'Authorization: Bearer YOUR_API_KEY' \
     --header 'accept: application/json' \
     --header 'content-type: application/json' \
     --data '
{
  "appId": "twenty",
  "clientId": "your_client_id obtained from above request",
  "clientSecret": "dummy"
}
'
Once Registered, OAuth will be used as a default authorization flow for all the
twentyintegrations made using your Knit Account (OAuth Creds are registered at a Org Level), and an example consent screen your users will see is as following,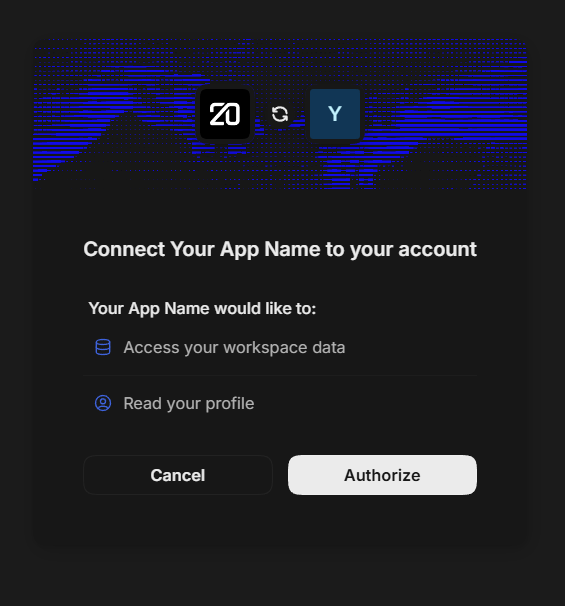
Updated 3 months ago