

Netsuite Payroll
Step 1: Enable Features
To use the NetSuite connector, REST Web Services and OAuth 2.0 must be enabled.
-
Go to Setup > Company > Enable Features
-
Under SuiteScript, enable:
- Client SuiteScript
- Server SuiteScript

-
Under SuiteTalk (Web Services), enable:
- REST Web Services

-
Under Manage Authentication, enable:
- OAuth 2.0
-
Click Save.
Step 2: Create Integration Record
-
Navigate to Setup > Integration > New
-
Enter a Name for your application.
-
(Optional) Add a description.
-
Set State to Enabled.
-
(Optional) Add a note.
-
Under the Authentication tab:
-
Enable REST Web Services.
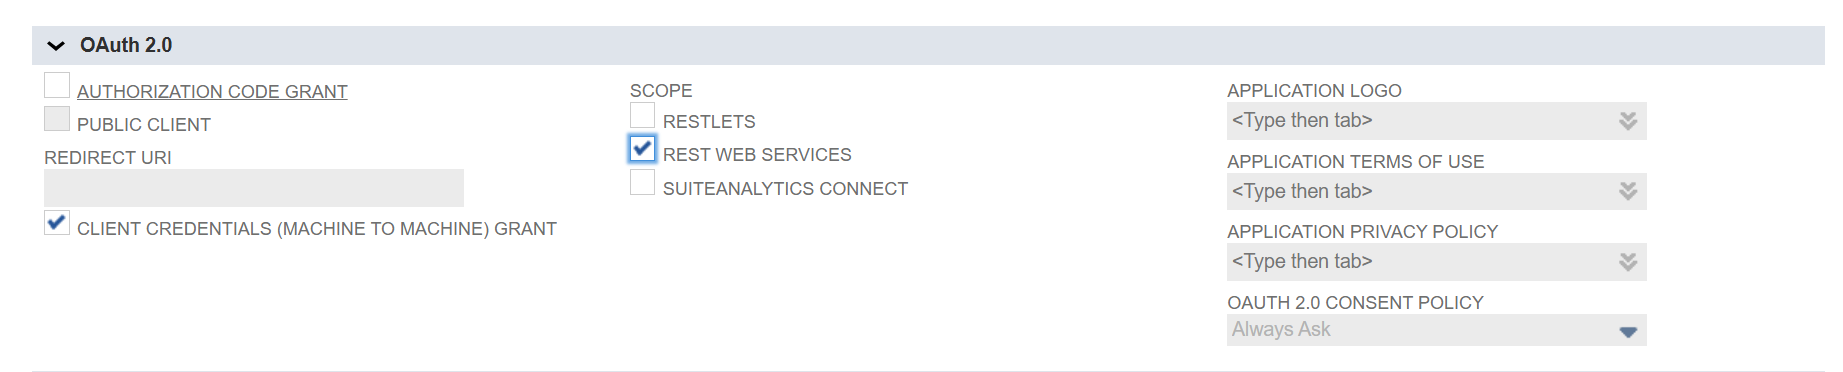
-
-
Click Save.
-
After saving, you will get the Client ID. Keep this ID safe—you'll need it later.

Step 3: OAuth 2.0 Client Credentials Setup
-
An administrator (or a role with OAuth 2.0 Authorized Applications Management) can create or revoke mappings for the OAuth 2.0 Client Credentials (M2M) flow.
-
Go to Setup > Integration > Manage Authentication > OAuth 2.0 Client Credentials (M2M) Setup
-
Click Create New.
-
In the popup:
- Select the Entity
- Set Role: Administrator
- Select the Application created in Step 2
- Upload the public certificate downloaded from the Knit UI popup
-
After creation, copy the Certificate ID and provide it to Knit during integration.
Updated 5 months ago